Love this? Save it for later!
Share the inspiration with your friends
“You really don’t need to fuss much about pies,” my friend said, handing me a slice of her homemade apple pie last fall. I was skeptical—pie crusts had always intimidated me with their delicate balance between crumbly and soggy. But that slice? The crust was flaky, buttery, and effortlessly perfect. It wasn’t just luck; it was a simple method she swore by. That moment stuck with me, especially when my weekend kitchen experiments usually ended with a tough or crumbly mess.
One chilly Sunday afternoon, I decided to give this flaky buttery pie crust recipe a proper shot. Honestly, it felt like a small act of rebellion against all those pie disasters I’d endured. The cool butter bits, the light dusting of flour, and the gentle folding—each step felt oddly calming, almost meditative. As the crust baked, the warm, buttery aroma filled the kitchen, reminding me of cozy holidays and old-fashioned bakeries. The first bite was a quiet revelation: the crust practically melted in my mouth, tender yet with that satisfying flake that you just can’t fake.
This recipe became my go-to whenever I wanted to impress without stress. It’s that kind of crust that turns a humble apple or pumpkin pie into a treasured homemade treat. No fancy tricks, just straightforward ingredients and a little patience. Over time, I learned how to trust the rhythm of the dough, and now, even my friends ask for this crust instead of store-bought. It’s funny how something so simple can become a little kitchen ritual — a buttery, flaky reminder that homemade doesn’t have to be complicated.
So, if you’ve ever hesitated to make your own pie crust or thought it was too tricky, this recipe is quietly here to change your mind. You’ll find out why it stuck with me, and maybe it will with you, too.
Why You’ll Love This Recipe
After countless trials and a few crumbly failures, I finally landed on this flaky buttery pie crust recipe that’s foolproof and honestly, a bit addictive. Here’s why I keep coming back to it:
- Quick & Easy: You can whip up the dough in about 15 minutes, making it perfect for those last-minute pie cravings or unexpected guests.
- Simple Ingredients: No need for fancy pantry finds—just butter, flour, salt, and a touch of cold water. I always recommend using a good-quality unsalted butter like Plugrá for that rich flavor.
- Perfect for Any Pie: Whether it’s a sweet apple pie or a savory quiche, this crust forms a tender, flaky base that holds up well.
- Crowd-Pleaser: This crust gets rave reviews every time—from kids who love the buttery crunch to adults who appreciate a homemade touch.
- Unbelievably Delicious: The texture is light but sturdy, with those signature layers that flake apart delightfully when you cut in.
What makes this recipe stand out? It’s all about how the butter is handled—cold, cut into small pieces, and folded gently into the flour. This creates pockets of butter that puff up during baking, giving you that perfect flake. Plus, the dough rests just enough to relax gluten without turning tough. You’ll notice this method is a bit different from the usual “cut butter with a pastry cutter” approach; it’s a technique I adapted from a chef’s tip that changed my pie game.
This crust isn’t just a base; it’s the soul of your homemade pies. It’s the kind that makes you close your eyes after the first buttery bite and savor the moment. Whether you’re aiming to impress at a holiday gathering or just treat yourself on a quiet evening, this flaky buttery pie crust is the reliable, delicious foundation you can count on.
What Ingredients You Will Need
This recipe uses simple, wholesome ingredients to deliver bold flavor and satisfying texture without the fuss. Most of these are pantry staples, and the few fresh items are easy to find in any grocery store.
- All-purpose flour: 2 ½ cups (315 grams), sifted for a light, airy dough
- Unsalted butter: 1 cup (227 grams), cold and cut into ½-inch cubes (I recommend Plugrá or Land O’Lakes for the best buttery flavor)
- Salt: 1 teaspoon, to enhance flavor balance
- Ice-cold water: 6-8 tablespoons (90-120 ml), added gradually to bring the dough together
- Optional: 1 teaspoon white vinegar or lemon juice (some bakers swear it tenderizes the dough and prevents toughness)
Choosing the right butter makes a noticeable difference. I’ve tried this recipe with European-style butter and regular unsalted butter, and I find that the higher fat content in European-style gives a richer taste and flakier layers. If you want a dairy-free twist, swap the butter with a solid coconut oil or vegan butter, but expect a slight change in texture and flavor.
If you’re baking a seasonal fruit pie, consider using fresh, ripe produce — the crust pairs wonderfully with anything from tart cranberries to sweet peaches. Don’t worry if you’re short on time; this crust works beautifully with frozen fruit fillings, too.
Equipment Needed
- Mixing bowl: A large, sturdy bowl to combine flour and salt
- Pastry cutter or two knives: For cutting butter into the flour; if you don’t have one, your fingers work fine—just keep them cool!
- Measuring cups and spoons: For precise ingredient amounts
- Rolling pin: Essential for rolling out the dough evenly to about ⅛-inch (3 mm) thickness
- Plastic wrap or clean kitchen towel: To wrap the dough and chill it
- Pie dish: A 9-inch (23 cm) dish is standard, but this dough scales well for other sizes
If you don’t own a pastry cutter, no worries. I often use a couple of butter knives crossed to cut the butter into the flour, or sometimes just my fingertips—but I try to work quickly to keep the butter cold. For rolling, a silicone mat or lightly floured countertop works best to prevent sticking. I’ve also had great luck chilling the rolling pin in the fridge before using it, which helps keep the dough cool as you work.
Preparation Method
- Mix the dry ingredients: In a large bowl, combine 2 ½ cups (315 g) of sifted all-purpose flour with 1 teaspoon of salt. Whisk briefly to blend evenly. This ensures the salt is well-distributed in your flour base.
- Cut in the cold butter: Add 1 cup (227 g) of cold, cubed unsalted butter to the flour mixture. Using a pastry cutter or two knives, cut the butter into the flour until the mixture resembles coarse crumbs with pea-sized chunks of butter still visible. This step is crucial for achieving that signature flakiness—those bits of butter create steam pockets during baking.
- Add cold water gradually: Sprinkle 6 tablespoons (90 ml) of ice-cold water over the mixture, tossing gently with a fork or your hands. If the dough seems dry, add up to 2 more tablespoons (30 ml) of water, but avoid over-wetting. The dough should just hold together when pressed.
- Optional acid addition: If you choose, add 1 teaspoon of white vinegar or lemon juice to the water before mixing. This can help relax gluten and make the crust more tender.
- Form the dough: Gather the mixture into a ball, then gently flatten it into a disk about 1 ½ inches (4 cm) thick. Wrap tightly in plastic wrap and refrigerate for at least 1 hour. This resting period chills the butter and lets the flour hydrate, which prevents shrinkage during baking.
- Roll out the dough: On a lightly floured surface, roll the chilled dough from the center outward to a 12-inch (30 cm) circle, about ⅛-inch (3 mm) thick. Use a floured rolling pin to avoid sticking. If the dough cracks at the edges, press it gently back together or patch with small scraps of dough.
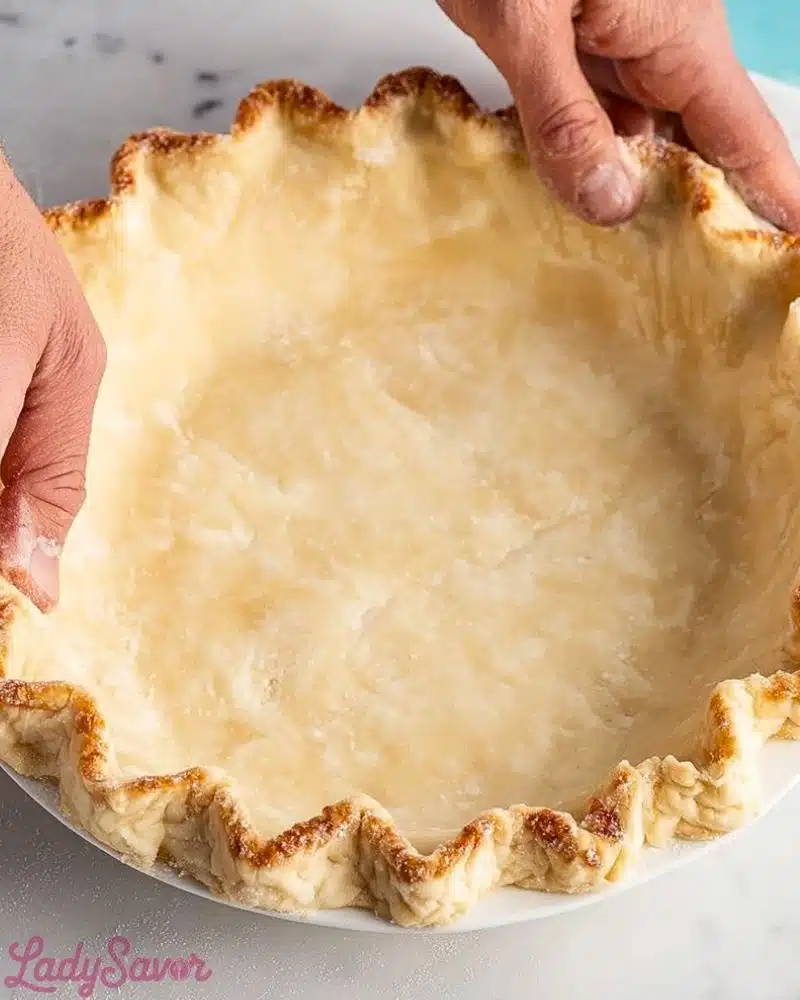
- Transfer to pie dish: Carefully roll the dough around your rolling pin and unroll it over a 9-inch (23 cm) pie dish. Gently press the dough into the dish, making sure it fits snugly without stretching.
- Trim and crimp edges: Trim excess dough, leaving about ½ inch (1.3 cm) overhang. Fold the edge under itself and crimp using your fingers or a fork for a classic look.
- Chill before baking: Refrigerate the prepared crust for 30 minutes before baking to prevent shrinking. If you’re blind-baking, prick the bottom with a fork to avoid bubbles and line with parchment paper filled with pie weights or dried beans.
- Bake: For blind baking, bake at 375°F (190°C) for 20-25 minutes until golden. For filled pies, follow your filling’s baking instructions but keep an eye on the crust edges to avoid burning.
Pro Tip: If your kitchen is warm, chill your mixing bowl and utensils beforehand. Keeping everything cold is key to flaky layers! Also, when rolling out the dough, try not to overwork it; a light touch means tender results.
Cooking Tips & Techniques
One thing I learned the hard way: overworking pie dough is the enemy. When you knead or roll the dough too much, it develops gluten, which makes the crust tough instead of flaky. So, keep your mixing and rolling gentle and quick.
Cold butter is non-negotiable. I keep my butter cubes in the freezer and toss them into the flour straight from there. Sometimes, I even chill the flour bowl in the fridge before starting. These little habits help maintain the butter’s integrity, which is what creates those flaky layers when baked.
Resting the dough in the fridge is another step you don’t want to skip. I’ve skipped it in a pinch, but the crust ended up shrinking and tough. Sitting in the fridge lets the butter firm up again and the flour absorb moisture, which means your crust will hold its shape better during baking.
For blind baking, lining the crust with parchment and filling it with pie weights or dried beans is a game-changer. It prevents bubbling and keeps the crust flat. When the edges start to brown too fast, I cover them with foil strips—simple but effective.
Multitasking tip: While the dough chills, I prep my filling or even throw together a quick side like sheet pan sausage and vegetables. It’s a nice way to keep the kitchen busy without stress.
Variations & Adaptations
This flaky buttery pie crust is versatile. Here are a few ways to make it your own:
- Gluten-free option: Swap the all-purpose flour for a gluten-free baking blend. Add a teaspoon of xanthan gum if your blend doesn’t contain it to help with structure.
- Whole wheat twist: Replace half the flour with whole wheat pastry flour for a nuttier, heartier crust. It’s a bit denser but still delicious, especially with savory pies.
- Herbed crust: Add 1 tablespoon of finely chopped fresh herbs like rosemary or thyme to the flour mixture for savory pies like quiches or pot pies.
- Sweet crust: Add 2 tablespoons of sugar to the flour for a subtly sweet crust perfect for fruit pies or tarts.
- Dairy-free alternative: Use solid coconut oil or a plant-based butter substitute for a vegan crust. The texture changes slightly but stays flaky.
I once tried this crust with a sprinkle of cinnamon in the dough for a spiced crust to pair with pear pie. It was a hit at a small gathering and added a subtle warmth that elevated the whole experience.
Serving & Storage Suggestions
Serve your pie crust warm or at room temperature for the best texture. If freshly baked, a light brush of melted butter adds a lovely sheen and extra richness. For fruit pies, a dollop of whipped cream or a scoop of vanilla ice cream is always a crowd favorite.
Storage is straightforward. Wrap leftover baked pie in plastic wrap or foil and refrigerate for up to 3 days. Unbaked dough can be wrapped tightly and frozen for up to 3 months—just thaw overnight in the fridge before rolling out.
Reheating is easiest in a low oven (around 300°F/150°C) for 10-15 minutes to bring back crispness without drying out. Avoid microwaving if you want to maintain that flaky texture.
Over time, if you store a filled pie overnight, the crust will soften slightly as it absorbs moisture from the filling. Sometimes that’s a good thing—especially with creamy pies. For maximum crispness, enjoy your pie on the day it’s baked.
Nutritional Information & Benefits
This flaky buttery pie crust is rich and satisfying. A single 1/8 pie slice (approximate) contains around 200 calories, primarily from the butter and flour. Butter provides a source of fat-soluble vitamins like A and E, and the flour contributes carbohydrates for energy.
While this crust isn’t exactly low-calorie, it’s made from simple, whole ingredients without additives or preservatives. For those watching gluten or dairy, the recipe adapts well with alternatives. Using high-quality butter means you’re getting a natural product with no hidden ingredients.
From a wellness perspective, making pie crust at home means you control what goes in—no mystery fats or stabilizers. It pairs well with nutrient-dense fillings like fresh fruits or vegetables, turning your homemade pie into a balanced treat.
Conclusion
Making a flaky buttery pie crust from scratch is one of those kitchen triumphs that feels rewarding every time. This recipe proves you don’t have to be a pastry pro to create a pie base that’s tender, flaky, and packed with flavor.
Feel free to experiment with the variations and make it yours. Whether you’re baking sweet or savory, this crust is a dependable foundation that will make every pie memorable. Personally, it became my go-to whenever I want a simple, no-fail crust that still impresses.
If you try it out, I’d love to hear how it turns out or what fillings you paired it with. Baking is better when shared, after all.
FAQs About Flaky Buttery Pie Crust
Can I use salted butter instead of unsalted?
Yes, but reduce or omit added salt in the recipe to avoid an overly salty crust.
How do I prevent my pie crust from shrinking?
Chill the dough well before baking and avoid stretching it when fitting it into the pie dish. Also, rest the dough after shaping to relax gluten.
What’s the best way to roll out pie dough without sticking?
Lightly flour your surface and rolling pin. If it sticks, chill the dough for a few minutes and try again.
Can I prepare the dough ahead of time?
Absolutely. You can refrigerate the dough for up to 2 days or freeze it for up to 3 months.
Is it necessary to blind bake the crust?
For pies with wet fillings or custards, yes, blind baking prevents sogginess. For fully baked fruit pies, you can often bake the crust and filling together.
For more cozy homemade treats with flaky textures, you might enjoy trying the flaky apple cream cheese danishes or the buttery tender soft buttery coconut cookies featured in earlier posts.
Pin This Recipe!
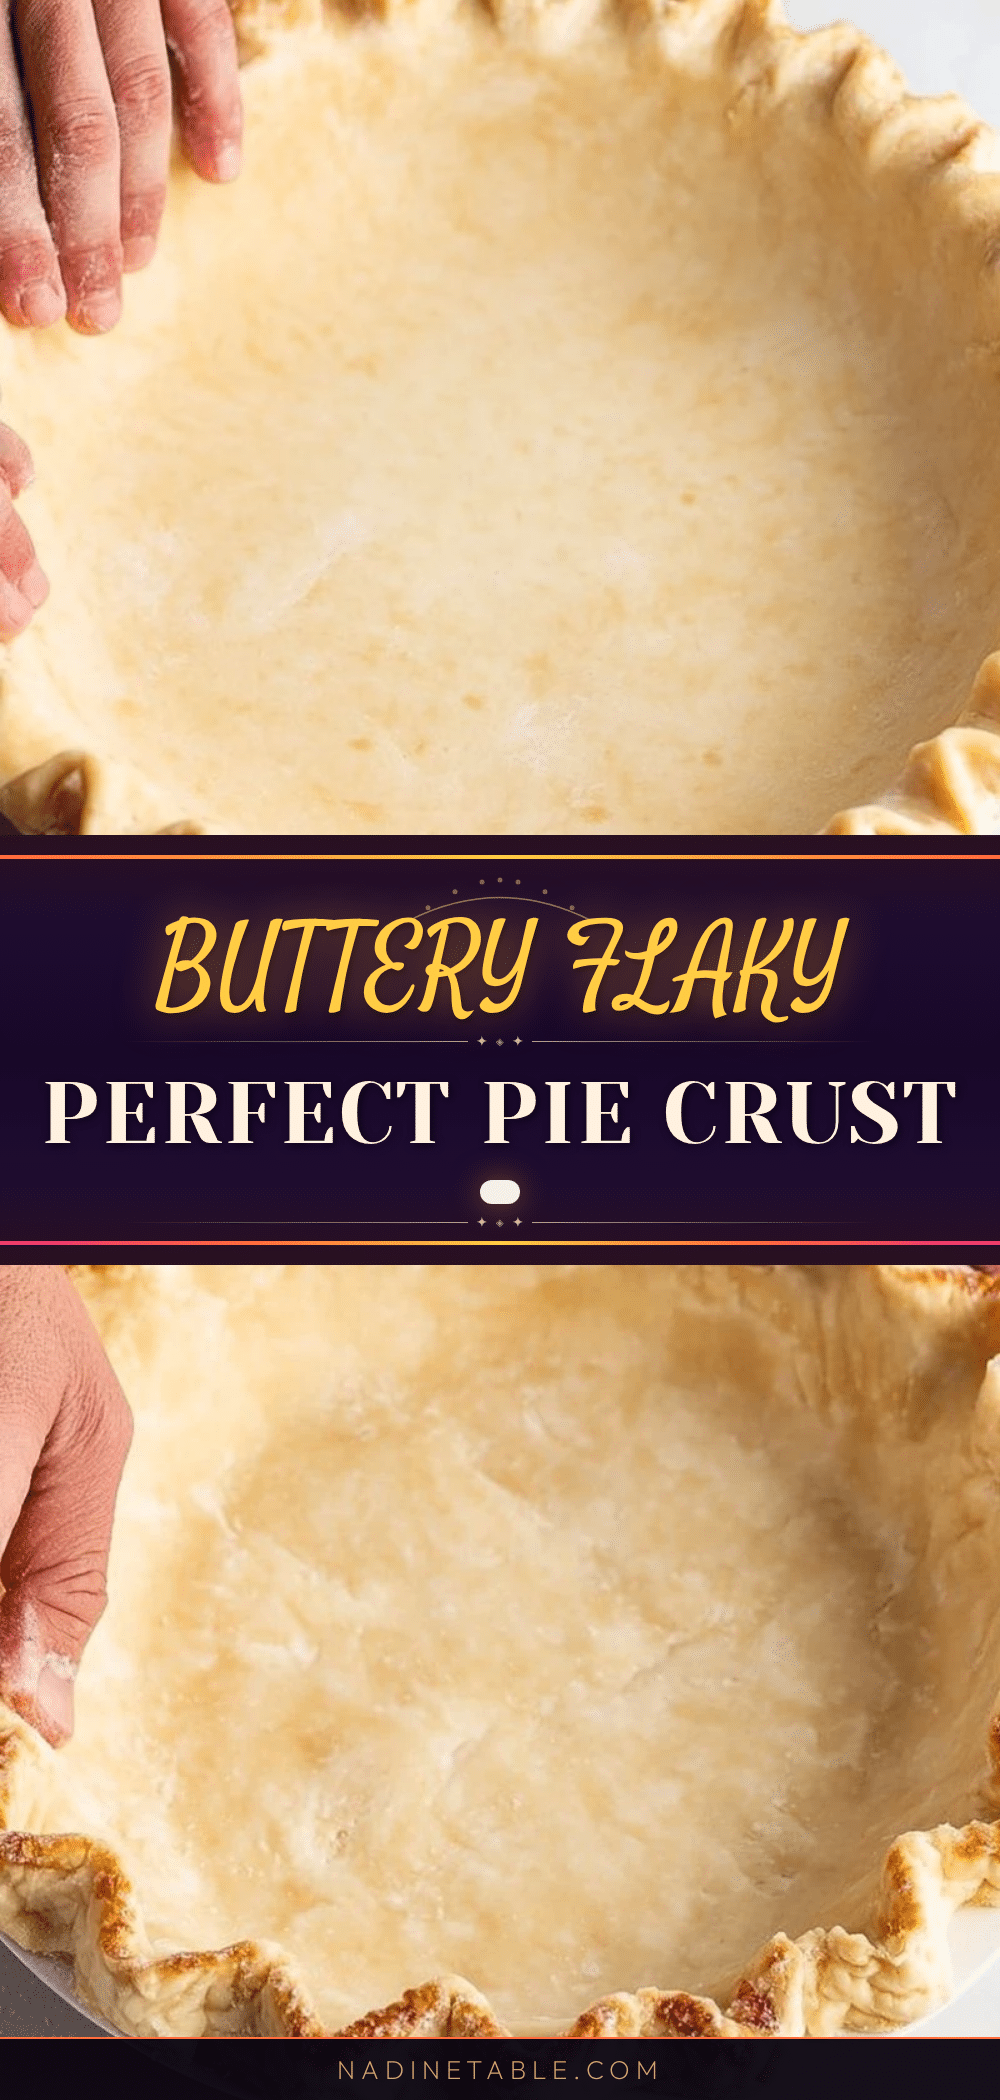
Flaky Buttery Pie Crust Recipe Easy Steps for Perfect Homemade Pies

A foolproof flaky and buttery pie crust recipe that is quick and easy to make with simple ingredients, perfect for sweet or savory pies.
- Prep Time: 15 minutes
- Cook Time: 20-25 minutes
- Total Time: 1 hour 40 minutes
- Yield: 1 9-inch pie crust 1x
- Category: Dessert
- Cuisine: American
Ingredients
- 2 ½ cups (315 grams) all-purpose flour, sifted
- 1 cup (227 grams) unsalted butter, cold and cut into ½-inch cubes
- 1 teaspoon salt
- 6–8 tablespoons (90–120 ml) ice-cold water, added gradually
- Optional: 1 teaspoon white vinegar or lemon juice
Instructions
- In a large bowl, combine 2 ½ cups (315 g) sifted all-purpose flour with 1 teaspoon salt. Whisk briefly to blend evenly.
- Add 1 cup (227 g) cold, cubed unsalted butter to the flour mixture. Cut the butter into the flour using a pastry cutter or two knives until the mixture resembles coarse crumbs with pea-sized chunks of butter.
- Sprinkle 6 tablespoons (90 ml) of ice-cold water over the mixture, tossing gently with a fork or hands. Add up to 2 more tablespoons (30 ml) if the dough seems dry, but avoid over-wetting. The dough should just hold together when pressed.
- If using, add 1 teaspoon white vinegar or lemon juice to the water before mixing.
- Gather the mixture into a ball, then flatten into a disk about 1 ½ inches (4 cm) thick. Wrap tightly in plastic wrap and refrigerate for at least 1 hour.
- On a lightly floured surface, roll the chilled dough from the center outward to a 12-inch (30 cm) circle, about ⅛-inch (3 mm) thick. Patch any cracks gently.
- Roll the dough around the rolling pin and unroll it over a 9-inch (23 cm) pie dish. Press the dough into the dish without stretching.
- Trim excess dough leaving about ½ inch (1.3 cm) overhang. Fold the edge under itself and crimp with fingers or a fork.
- Refrigerate the prepared crust for 30 minutes before baking to prevent shrinking. For blind baking, prick the bottom with a fork, line with parchment paper, and fill with pie weights or dried beans.
- Bake at 375°F (190°C) for 20-25 minutes until golden for blind baking. For filled pies, follow filling baking instructions and watch crust edges to avoid burning.
Notes
Keep butter and utensils cold to maintain flaky layers. Avoid overworking dough to prevent toughness. Rest dough in fridge at least 1 hour before rolling. For blind baking, use parchment and weights to prevent bubbling. Cover edges with foil if browning too fast. Dough can be refrigerated up to 2 days or frozen up to 3 months.
Nutrition
- Serving Size: 1/8 of a 9-inch pie
- Calories: 200
- Sodium: 200
- Fat: 14
- Saturated Fat: 9
- Carbohydrates: 18
- Fiber: 1
- Protein: 2
Keywords: pie crust, flaky pie crust, buttery pie crust, homemade pie crust, easy pie crust, pie dough, baking, dessert crust