Love this? Save it for later!
Share the inspiration with your friends
The cheese was still bubbling when I pulled the skillet off the heat. My husband walked in from the garage, dropped his bag, and just stood there—not saying anything, just staring at the pan. “Is that… what I think it is?” he asked, already reaching for a plate. I’d been testing dinner ideas all week, and honestly, this one started as a fridge-cleaning experiment. Leftover ground beef, a half-bag of shredded mozzarella, and some flour tortillas that were one day away from the trash. I figured I’d throw it all together, call it a win, and move on. But the first bite stopped me cold. The tortilla had turned golden and shatteringly crisp on the outside, while the inside was this gooey, savory pocket of cheesy beef goodness. It tasted like something you’d order at a fair or a food truck, not something you threw together on a Tuesday night in your sweatpants.
I made them again the next night. And the night after that. By Friday, I had the process down to exactly fifteen minutes from start to plate. No complicated steps, no weird ingredients—just crispy tortillas, melty cheese, and seasoned beef that hits every single craving you have. These crispy cheesy beef tortilla pockets have become my weeknight secret weapon. They’re the kind of recipe you keep in your back pocket for those nights when you need dinner on the table fast, but you also need it to feel like a treat. Because let’s be real—we all deserve a little crispy, cheesy joy in our lives.
Why You’ll Love This Recipe
I’ve tested this recipe more times than I care to admit. Burnt tortillas, leaking cheese, filling that was too dry—I made every mistake so you don’t have to. Here’s why these pockets are worth your time:
- Ready in 15 Minutes: From fridge to table in under a quarter of an hour. No marinating, no resting, no waiting around.
- Simple Pantry Ingredients: Ground beef, tortillas, cheese, and a few seasonings. You probably have everything right now.
- Perfect for Busy Weeknights: When you’re tired and hungry and the last thing you want to do is cook a complicated meal.
- Crowd-Pleaser: Kids devour them. Adults request them. They disappear faster than you’d expect.
- Unbelievably Satisfying: That contrast between the crispy exterior and the molten, cheesy interior? Absolute magic.
What makes these different from other tortilla recipes is the technique. I figured out the exact heat level and cooking time to get the tortilla golden and crunchy without burning, and the perfect cheese-to-beef ratio so every bite is stretchy and flavorful. No soggy bottoms, no dry filling—just consistently perfect pockets every single time. And honestly, there’s something deeply comforting about biting into a warm, crispy pocket filled with melty cheese and savory beef. It’s the kind of meal that makes you forget whatever stress you carried into the kitchen.
What Ingredients You Will Need
This recipe uses simple, everyday ingredients to create something surprisingly special. Nothing fancy, nothing hard to find—just good, honest food that works together beautifully.
For the Beef Filling:
- 1 pound ground beef (80/20 works best—the fat keeps the filling moist and flavorful)
- 1 small yellow onion, finely diced (about ½ cup; adds sweetness and texture)
- 2 cloves garlic, minced (fresh is best, but jarred works in a pinch)
- 1 teaspoon chili powder (I prefer McCormick for consistent heat)
- ½ teaspoon cumin (gives that warm, earthy depth)
- ½ teaspoon smoked paprika (optional, but adds a subtle smokiness I love)
- Salt and black pepper to taste
- 2 tablespoons tomato paste (adds richness and helps bind the filling)
- 2 tablespoons water (loosens the filling so it’s not too dense)
For the Tortilla Pockets:
- 4 large flour tortillas (burrito-size, about 10 inches; look for ones that are pliable and not too thick)
- 1½ cups shredded mozzarella cheese (low-moisture, whole-milk mozzarella melts the best—trust me on this)
- ½ cup shredded cheddar cheese (adds sharpness and color)
- 2 tablespoons butter, softened (for brushing the tortillas—this is what gives them that golden, crispy crust)
For Serving (Optional but Recommended):
- Sour cream
- Salsa or pico de gallo
- Fresh cilantro, chopped
- Lime wedges
Substitution Notes: You can swap ground beef for ground turkey or chicken, just add a tablespoon of olive oil to keep it from drying out. For a vegetarian version, use crumbled tempeh or a plant-based ground meat substitute. If you’re dairy-free, use your favorite vegan shredded cheese—just know the melt won’t be quite as stretchy. And if you only have small tortillas, just make more pockets—no judgment here.
Equipment Needed
You don’t need a fancy kitchen to make these pockets. Here’s what you’ll need:
- Large non-stick skillet (12-inch is ideal; cast iron works beautifully too)
- Spatula (preferably a thin metal one for flipping)
- Cutting board and sharp knife
- Small bowl (for the filling mixture)
- Pastry brush (or just use a paper towel to spread butter)
- Plate or baking sheet (to hold assembled pockets before cooking)
If you don’t have a non-stick skillet, a well-seasoned cast iron pan works great—just make sure it’s hot enough before adding the tortillas. And honestly, if you don’t have a pastry brush, just smear the butter on with your fingers. I’ve done it. It works.
Preparation Method
Let’s get cooking. This comes together fast, so have everything prepped and ready before you start.
-
Cook the beef filling. Heat your skillet over medium-high heat. Add the ground beef and cook, breaking it up with your spatula, until browned—about 5 minutes. Drain off excess fat if needed (leave about a tablespoon for flavor). Add the diced onion and cook for 2 minutes until softened. Stir in the garlic, chili powder, cumin, smoked paprika, salt, and pepper. Cook for 30 seconds until fragrant. Add the tomato paste and water, stir well, and cook for another minute until the mixture is thick and cohesive. Transfer to a bowl and let it cool slightly—about 5 minutes. You want it warm but not piping hot so it doesn’t make the tortillas soggy.
-
Prep your tortillas. Lay the flour tortillas flat on your cutting board. Lightly brush one side of each tortilla with softened butter. This is the outside of your pocket—the butter will help it crisp up and turn golden brown in the pan.
-
Assemble the pockets. Flip the tortillas over so the buttered side is facing down. On the bottom half of each tortilla (closest to you), sprinkle about 2 tablespoons of the mozzarella-cheddar cheese mixture. Top with about ⅓ cup of the beef filling (don’t overstuff—you need room to seal). Sprinkle another 2 tablespoons of cheese on top of the beef. Fold the top half of the tortilla over the filling to create a half-moon shape. Press gently to seal the edges. The cheese will act as glue once it melts, so don’t worry if the edges aren’t perfectly tight.
-
Cook the pockets. Wipe out the skillet with a paper towel (no need to wash it). Place it back over medium heat. Carefully place the assembled pockets in the skillet, buttered side down. Cook for 2-3 minutes until the bottom is golden brown and crispy. Use your spatula to carefully flip each pocket. Cook for another 2-3 minutes on the second side until golden and the cheese is melted and bubbly. You should see a little cheese oozing out the edges—that’s a good sign.
-
Rest and serve. Transfer the cooked pockets to a plate and let them rest for 1-2 minutes. This helps the cheese set slightly so it doesn’t all spill out when you bite into it. Slice in half if you want, or serve whole. Add your favorite toppings and dig in while they’re still warm and crispy.
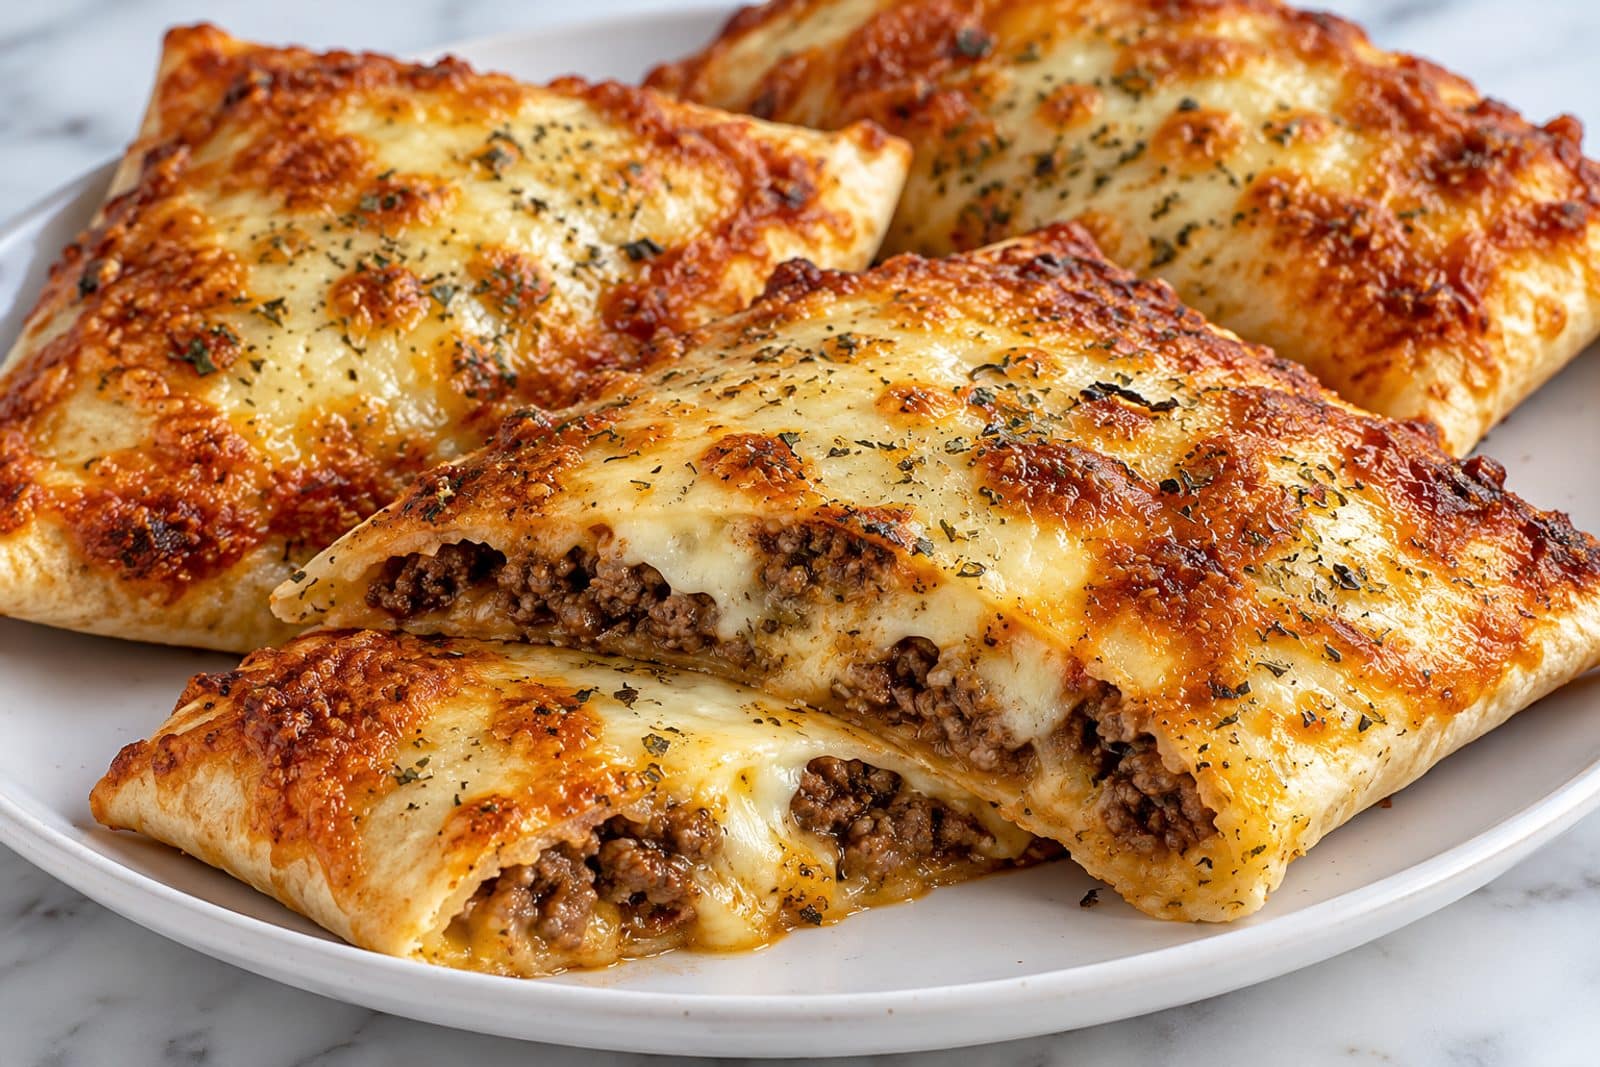
Sensory cues to watch for: When the filling is ready, it should look thick and slightly glossy, not watery. The tortilla should sizzle when it hits the pan—if it doesn’t, the pan isn’t hot enough. When you flip the pocket, the cooked side should be an even golden brown with darker spots in the thinner areas. And when you cut into it, the cheese should stretch and pull in long, satisfying strands.
Cooking Tips & Techniques
I learned most of these the hard way, so you don’t have to. Here’s what I wish someone had told me:
Don’t skip the cooling step. I know you want to rush, but if you add hot filling to the tortilla, the steam will make it soggy before it even hits the pan. Let the filling cool for 5 minutes. Your pockets will be crispier for it.
Medium heat is your friend. High heat burns the tortilla before the cheese melts. Low heat makes it tough and chewy. Medium heat gives you that perfect golden crust and fully melted interior. Trust the process.
Don’t overcrowd the pan. Cook one or two pockets at a time, depending on your skillet size. If you cram them in, they steam instead of crisp. Give them room to breathe.
Press gently when flipping. Use a thin spatula and slide it under the pocket with confidence. If the cheese has leaked and stuck to the pan, let it cook another 30 seconds—it will release naturally when it’s ready.
My biggest failure: The first time I made these, I used pre-shredded cheese from a bag. It melted okay, but it wasn’t stretchy or creamy. The anti-caking coating on pre-shredded cheese prevents it from melting properly. Shred your own cheese from a block—it makes a real difference. I promise it’s worth the extra 30 seconds.
Timing strategy: Prep the filling while you shred the cheese. Assemble the pockets while the filling cools. Cook while you set the table. Everything flows together if you stay organized.
Variations & Adaptations
These pockets are endlessly adaptable. Here are some of my favorite twists:
Spicy Chorizo Version: Swap the ground beef for Mexican chorizo (remove the casing first). Omit the chili powder and cumin—chorizo is already heavily seasoned. Add a tablespoon of pickled jalapeños to the filling for extra heat. This version is bold, smoky, and absolutely addictive.
Black Bean & Corn Vegetarian: Replace the beef with one can of drained black beans and ½ cup of frozen corn (thawed). Add a tablespoon of taco seasoning instead of the individual spices. The beans add protein and fiber, and the corn gives little bursts of sweetness. My vegetarian friends request this version constantly.
Buffalo Chicken Twist: Use shredded cooked chicken (rotisserie works great) mixed with ¼ cup of buffalo sauce. Swap the mozzarella for crumbled blue cheese or sharp cheddar. Serve with ranch or blue cheese dressing for dipping. It’s messy but so worth it.
Breakfast Pocket: Fill with scrambled eggs, cooked breakfast sausage, and cheddar cheese. Skip the tomato paste and spices—just salt and pepper. These are incredible for a quick breakfast-for-dinner night.
Low-Carb Option: Use low-carb tortillas or large lettuce wraps. The cooking time stays the same, though lettuce wraps won’t get crispy. Still delicious, just different.
Serving & Storage Suggestions
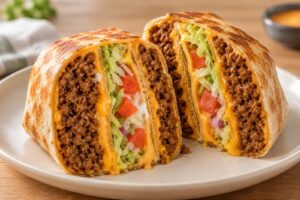
These pockets are best served fresh and hot, straight from the skillet. The contrast between the crispy exterior and the molten interior is at its peak within the first 5 minutes. Serve them whole or cut in half on a diagonal—the cross-section of crispy tortilla, melty cheese, and savory beef is honestly beautiful.
What to serve alongside: A simple side salad with lime vinaigrette cuts through the richness beautifully. Mexican rice, refried beans, or a bowl of fresh authentic guacamole are all excellent choices. For dipping, try sour cream, salsa, or a quick crema made from Greek yogurt and lime juice.
Storage: If you have leftovers (unlikely, but possible), let them cool completely, then wrap individually in foil or plastic wrap. Store in the refrigerator for up to 3 days. The texture won’t be as crispy after refrigeration, but the flavor is still fantastic.
Reheating: The best way to revive these pockets is in a dry skillet over medium heat. Cook for 2-3 minutes per side until heated through and crispy again. The microwave works in a pinch (about 45 seconds), but the tortilla will be soft, not crispy. An air fryer at 350°F for 3-4 minutes is also excellent.
Freezer instructions: Assemble the pockets completely but don’t cook them. Wrap each uncooked pocket tightly in plastic wrap, then place in a freezer bag. Freeze for up to 2 months. To cook from frozen, add 2-3 minutes to the cooking time, starting with the pan covered for the first few minutes to ensure the center heats through.
Nutritional Information & Benefits
Per pocket (approximate, based on the recipe as written):
- Calories: 485
- Protein: 32g
- Fat: 28g
- Carbohydrates: 28g
- Fiber: 2g
- Calcium: 35% DV
- Iron: 20% DV
These pockets are a good source of protein from the beef and cheese, which helps keep you full and satisfied. The calcium from the cheese supports bone health, and the iron from the beef is important for energy levels. If you’re watching your sodium, use low-sodium tortillas and reduce the added salt. For a lighter version, use ground turkey and reduced-fat cheese—the texture will still be great, just with fewer calories and less fat.
Dietary considerations: This recipe contains gluten (tortillas) and dairy (cheese, butter). It is not suitable for vegans or those with celiac disease without substitutions. For a gluten-free version, use certified gluten-free tortillas. For a dairy-free version, use vegan cheese and butter substitutes—just know the melt and crisp won’t be identical.
Conclusion
These crispy cheesy beef tortilla pockets have become a staple in my kitchen for a reason. They’re fast, they’re forgiving, and they deliver exactly what you want from a weeknight dinner—satisfaction without the stress. Whether you’re feeding a hungry family, impressing a picky eater, or just treating yourself after a long day, these pockets hit the spot every single time.
I love that this recipe feels like a celebration even though it takes almost no effort. It’s the kind of meal that makes you feel like you pulled off something special, even when you’re just using what’s in your fridge. And honestly, that’s my favorite kind of cooking.
I’d love to hear how yours turn out! Did you try a fun variation? Add a secret ingredient? Serve them with something unexpected? Drop a comment below and share your twist. And if you loved this recipe, pass it along to a friend who needs a quick dinner win. Happy cooking!
Frequently Asked Questions
Can I use corn tortillas instead of flour?
You can, but corn tortillas are smaller and more brittle. They won’t fold as easily and may crack when you try to seal them. If you use corn, warm them first in the microwave for 15 seconds to make them more pliable, and use less filling.
Why did my tortilla pockets turn out soggy?
Soggy pockets usually happen for one of three reasons: the filling was too hot when you assembled them (let it cool), the pan wasn’t hot enough (use medium heat), or you overcrowded the pan (cook in batches). Fix those three things and you’ll get crispy pockets every time.
Can I make these ahead of time for a party?
Absolutely. Assemble the pockets up to 24 hours in advance and keep them covered in the refrigerator. Cook them just before serving. You can also cook them fully, then reheat in the oven at 350°F for 5-7 minutes to crisp them back up.
What’s the best cheese for maximum stretch?
Low-moisture, whole-milk mozzarella is the winner here. It melts into that perfect stretchy, gooey texture without becoming greasy. Adding a little cheddar or Monterey Jack gives extra flavor, but mozzarella is the star for meltability.
How do I keep the filling from leaking out while cooking?
Don’t overstuff the pockets—leave at least a ½-inch border around the edges. Press the edges firmly to seal, and make sure the cheese is touching the edges of the tortilla—it will melt and act like glue. If a little leaks out, that’s okay—it creates crispy cheese bits on the outside that are honestly delicious.
Pin This Recipe!
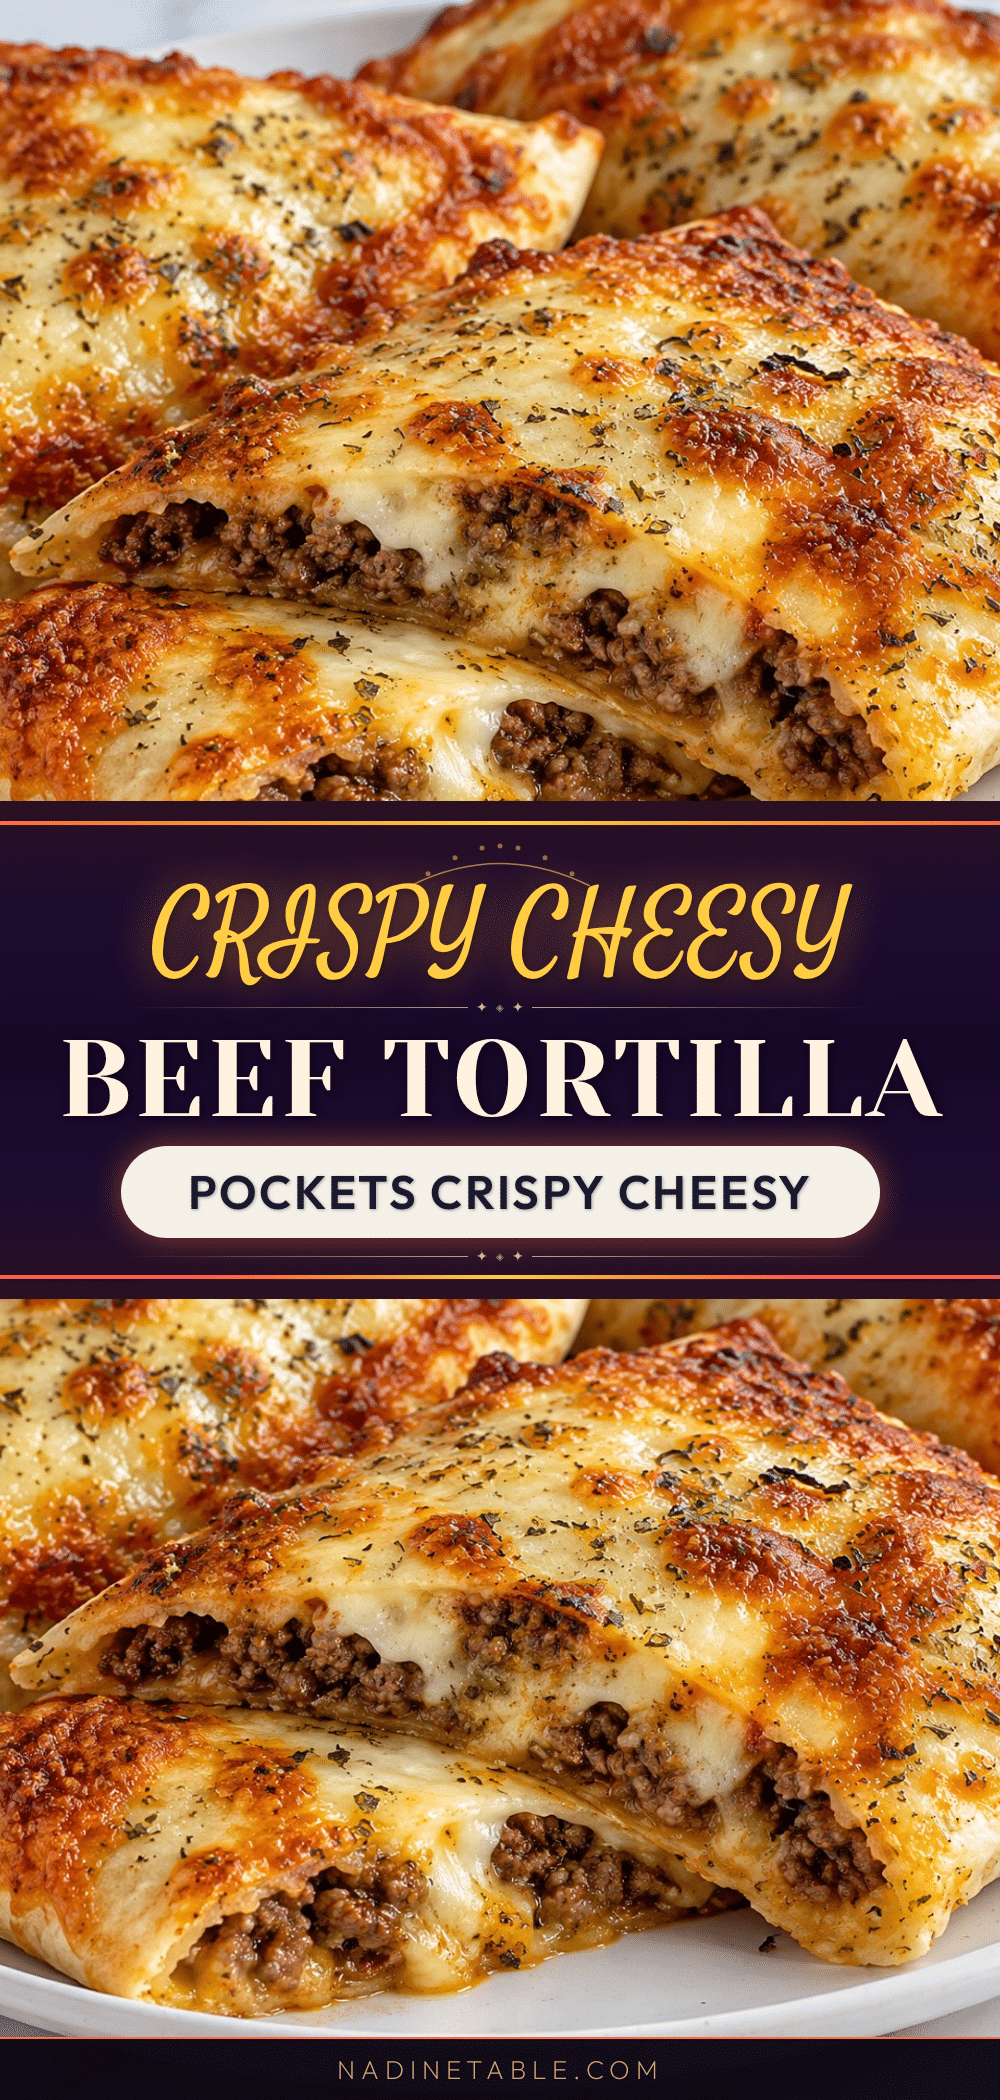
Crispy Cheesy Beef Tortilla Pockets: Easy 15-Min Recipe

Crispy tortilla pockets filled with seasoned ground beef and melted cheese, ready in just 15 minutes. A perfect weeknight dinner that feels like a treat.
- Prep Time: 10 minutes
- Cook Time: 10 minutes
- Total Time: 15 minutes
- Yield: 4 servings 1x
- Category: Main Course
- Cuisine: Mexican
Ingredients
- 1 pound ground beef (80/20)
- 1 small yellow onion, finely diced (about ½ cup)
- 2 cloves garlic, minced
- 1 teaspoon chili powder
- ½ teaspoon cumin
- ½ teaspoon smoked paprika (optional)
- Salt and black pepper to taste
- 2 tablespoons tomato paste
- 2 tablespoons water
- 4 large flour tortillas (burrito-size, about 10 inches)
- 1½ cups shredded mozzarella cheese (low-moisture, whole-milk)
- ½ cup shredded cheddar cheese
- 2 tablespoons butter, softened
- Sour cream (for serving, optional)
- Salsa or pico de gallo (for serving, optional)
- Fresh cilantro, chopped (for serving, optional)
- Lime wedges (for serving, optional)
Instructions
- Cook the beef filling. Heat your skillet over medium-high heat. Add the ground beef and cook, breaking it up with your spatula, until browned—about 5 minutes. Drain off excess fat if needed (leave about a tablespoon for flavor). Add the diced onion and cook for 2 minutes until softened. Stir in the garlic, chili powder, cumin, smoked paprika, salt, and pepper. Cook for 30 seconds until fragrant. Add the tomato paste and water, stir well, and cook for another minute until the mixture is thick and…
- Prep your tortillas. Lay the flour tortillas flat on your cutting board. Lightly brush one side of each tortilla with softened butter.
- Assemble the pockets. Flip the tortillas over so the buttered side is facing down. On the bottom half of each tortilla (closest to you), sprinkle about 2 tablespoons of the mozzarella-cheddar cheese mixture. Top with about ⅓ cup of the beef filling. Sprinkle another 2 tablespoons of cheese on top of the beef. Fold the top half of the tortilla over the filling to create a half-moon shape. Press gently to seal the edges.
- Cook the pockets. Wipe out the skillet with a paper towel. Place it back over medium heat. Carefully place the assembled pockets in the skillet, buttered side down. Cook for 2-3 minutes until the bottom is golden brown and crispy. Use your spatula to carefully flip each pocket. Cook for another 2-3 minutes on the second side until golden and the cheese is melted and bubbly.
- Rest and serve. Transfer the cooked pockets to a plate and let them rest for 1-2 minutes. Slice in half if you want, or serve whole. Add your favorite toppings and dig in while they’re still warm and crispy.
Notes
Let the filling cool for 5 minutes before assembling to prevent soggy tortillas. Use medium heat for best results. Shred your own cheese from a block for better melt. Don’t overcrowd the pan. For freezing, assemble uncooked pockets and freeze for up to 2 months; add 2-3 minutes to cooking time when cooking from frozen.
Nutrition
- Serving Size: 1 pocket
- Calories: 485
- Sugar: 3
- Sodium: 680
- Fat: 28
- Saturated Fat: 12
- Carbohydrates: 28
- Fiber: 2
- Protein: 32
Keywords: crispy cheesy beef tortilla pockets, 15 minute recipe, weeknight dinner, ground beef, tortilla pockets, cheesy beef