Love this? Save it for later!
Share the inspiration with your friends
The first time I made these onion rings, I was honestly just trying to use up the last of a massive bag of yellow onions before they went soft. I had no grand plan—just a craving for something crunchy and a vague memory of a dipping sauce from a fast-food run months ago. I pulled out my buttermilk, grabbed the panko, and figured I’d wing it. Twenty minutes later, I was standing over the counter, eating them straight off the paper towel, completely quiet except for the crunch. That’s when I knew I had stumbled onto something worth writing down.
What makes these rings different isn’t some complicated technique or a secret ingredient you have to hunt for. It’s the double-dredge method and the way the panko clings to the onion, creating this shatteringly crisp shell that doesn’t go soggy. And the sauce? It’s that tangy, slightly peppery, creamy-sweet situation that makes you want to dip everything in it—fries, chicken, even a stray piece of bread if you’re not careful. Honestly, I’ve made these for game days, backyard barbecues, and random Tuesday nights, and they disappear every single time.
So if you’ve been looking for the best crispy onion rings with Canes-style sauce recipe that actually delivers on crunch and flavor, you’re in the right place. This isn’t a fussy restaurant project—it’s the kind of snack you can pull together with stuff you probably already have. And once you taste that sauce, you’ll never look at store-bought ranch the same way again.
Why You’ll Love This Recipe
I’ve tested a lot of onion ring recipes over the years—some were too greasy, some had batter that slid right off, and others just didn’t have that satisfying snap when you bite into them. This version is the one I keep coming back to, and here’s why it works:
- Quick & Easy: From start to finish, these rings are ready in under 30 minutes. No overnight soaking, no complicated batter—just a simple dredge and fry.
- Simple Ingredients: You probably have most of these in your pantry right now. No need for specialty flours or obscure spices.
- Perfect for Game Day or Parties: These rings are the kind of appetizer that gets passed around and disappears fast. They hold up well even after a few minutes on the table.
- Crowd-Pleaser: I’ve served these to kids, picky eaters, and serious foodies—everyone reaches for seconds. The sauce is the real star here.
- Unbelievably Crispy: Thanks to the buttermilk soak and panko coating, each ring stays crunchy long after it leaves the oil. No sad, limp rings here.
What really sets this recipe apart is the double-dredge technique. Instead of just dipping the onions in flour then egg, you give them a quick soak in seasoned buttermilk first, then flour, then back into the buttermilk, and finally into the panko. It sounds like extra work, but trust me—it creates a crust that clings to the onion like armor. And that sauce? It’s a perfect balance of creamy, tangy, and peppery, with just enough sweetness to keep you dipping. I’ve had friends ask for the sauce recipe more times than I can count.
What Ingredients You Will Need
This recipe uses simple, everyday ingredients to build big flavor and that signature crunch. Most of these are pantry staples, so you probably won’t need a special trip to the store.
- For the Onion Rings:
- 2 large yellow onions (sweet onions like Vidalia work great too)
- 1 cup buttermilk (adds tanginess and helps the coating stick)
- 1 large egg
- 1 cup all-purpose flour
- 1 teaspoon garlic powder
- 1 teaspoon smoked paprika
- 1/2 teaspoon cayenne pepper (optional, for heat)
- 1 teaspoon salt
- 1/2 teaspoon black pepper
- 2 cups panko breadcrumbs (regular breadcrumbs won’t give you the same crunch)
- Vegetable oil or canola oil for frying (enough to fill a pot about 2 inches deep)
- For the Canes-Style Sauce:
- 1/2 cup mayonnaise (I prefer Duke’s or Hellmann’s for creaminess)
- 1/4 cup ketchup
- 2 teaspoons Worcestershire sauce
- 1 teaspoon garlic powder
- 1 teaspoon smoked paprika
- 1/2 teaspoon cayenne pepper (adjust to your heat preference)
- 1/2 teaspoon black pepper
- 1/2 teaspoon salt
- 1 teaspoon white vinegar (adds that tangy kick)
For the onions, I recommend yellow or sweet onions because they have a milder flavor that gets sweet and tender when fried. If you only have red or white onions, they’ll work too—just expect a slightly sharper bite. The buttermilk is key here; it tenderizes the onion and helps the flour mixture stick. If you don’t have buttermilk, you can make a quick substitute by adding 1 tablespoon of lemon juice or white vinegar to 1 cup of milk and letting it sit for 5 minutes.
For the panko, I’ve tested both regular panko and seasoned panko, and plain panko gives you more control over the flavor. You can season it yourself, which is what we’re doing here. And for the oil, use something with a high smoke point like vegetable, canola, or peanut oil. Olive oil will burn at frying temperature, so save that for salads.
Equipment Needed
You don’t need a deep fryer or any fancy gadgets for these onion rings. Here’s what you’ll need:
- Large heavy-bottomed pot or Dutch oven: This holds the heat steady and prevents temperature drops when you add the rings.
- Deep-fry thermometer: Essential for keeping the oil at 350°F (175°C). Guessing leads to greasy or burnt rings.
- Shallow bowls or pie plates: For setting up your dredging station—you’ll need three.
- Tongs or a slotted spoon: For safely lowering and removing the rings from the hot oil.
- Paper towels or a wire rack: For draining the fried rings. A wire rack set over a baking sheet keeps them crisper than paper towels.
- Sharp knife and cutting board: For slicing the onions into even rings.
- Small bowl and whisk: For mixing the dipping sauce.
If you don’t have a deep-fry thermometer, you can test the oil by dropping a small piece of bread into it—if it sizzles and turns golden in about 60 seconds, the oil is ready. I’ve used both a Dutch oven and a regular stainless steel pot, and both work fine. Just make sure the pot is deep enough to prevent oil splatter.
Preparation Method
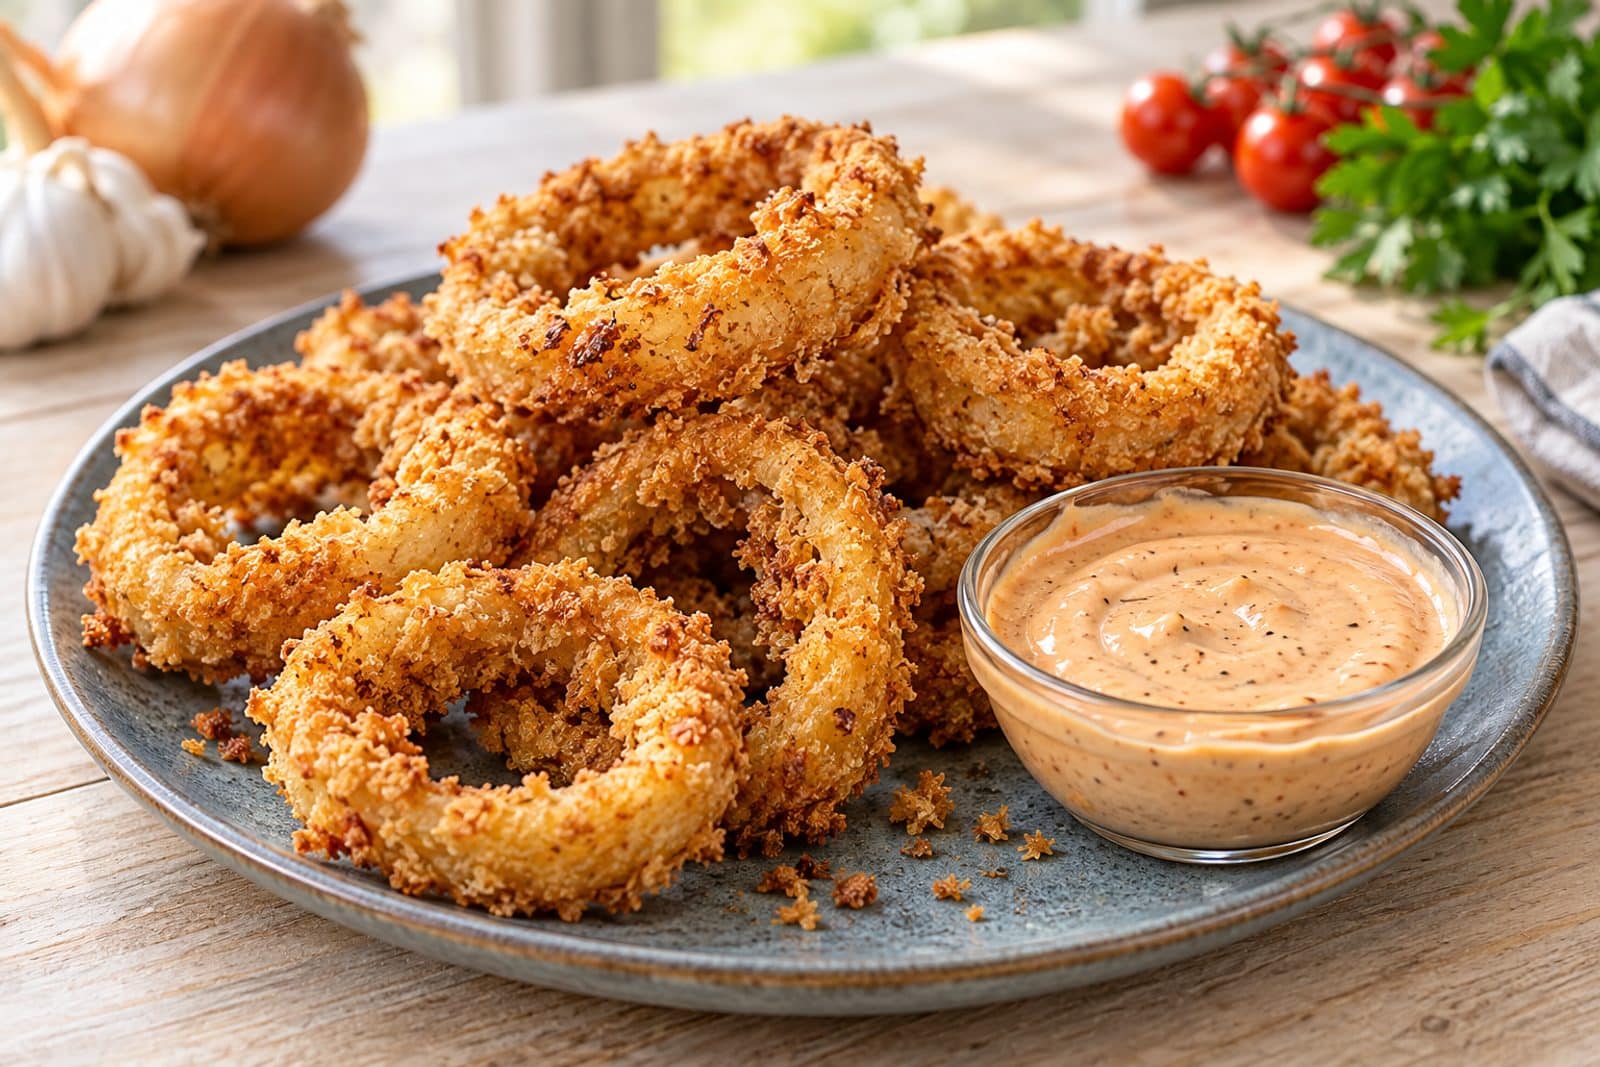
Let’s get to the fun part. Here’s how to make these onion rings step by step:
- Slice the onions: Peel the onions and slice them into 1/2-inch thick rings. Separate the rings gently, discarding any papery skin or tiny inner pieces. You want the big, sturdy rings for the best results. Set them aside on a plate.
- Make the buttermilk mixture: In a shallow bowl, whisk together the buttermilk and egg until smooth. This is your wet dredge.
- Prepare the flour mixture: In a second shallow bowl, combine the all-purpose flour, garlic powder, smoked paprika, cayenne (if using), salt, and black pepper. Stir with a fork until evenly mixed.
- Set up the panko station: In a third shallow bowl, pour the panko breadcrumbs. You can season them with a pinch of salt and pepper if you like, but the flour mixture already has plenty of flavor.
- Double-dredge the rings: Take one onion ring and dip it first into the buttermilk mixture, letting any excess drip off. Then coat it in the seasoned flour, shaking off the excess. Dip it back into the buttermilk mixture for a second coat, then finally press it into the panko, making sure it’s fully covered. Place the coated ring on a baking sheet lined with parchment paper. Repeat with all the rings. This double-dredge is what gives you that extra-thick, shatteringly crispy crust.
- Heat the oil: Pour about 2 inches of vegetable oil into your heavy-bottomed pot. Heat over medium-high heat until the oil reaches 350°F (175°C). Use your thermometer to monitor the temperature—don’t let it go above 375°F or the rings will burn before the onion cooks through.
- Fry in batches: Carefully lower 4-5 onion rings into the hot oil using tongs. Don’t overcrowd the pot—this drops the oil temperature and makes the rings greasy. Fry for 2-3 minutes, flipping once halfway through, until golden brown and crispy. The rings should sizzle as soon as they hit the oil. If they don’t, the oil isn’t hot enough yet.
- Drain and season: Use tongs to transfer the fried rings to a wire rack set over a baking sheet (or a plate lined with paper towels). Immediately sprinkle with a tiny pinch of salt while they’re still hot. This helps the salt stick and balances the flavor.
- Make the sauce: While the rings cool slightly, whisk together all the sauce ingredients in a small bowl—mayonnaise, ketchup, Worcestershire sauce, garlic powder, smoked paprika, cayenne, black pepper, salt, and white vinegar. Taste and adjust the seasoning. I like mine with a little extra vinegar for tang.
- Serve immediately: Arrange the crispy onion rings on a platter with the Canes-style sauce on the side. They’re best eaten within 10 minutes of frying, but honestly, they rarely last that long.
Cooking Tips & Techniques
After making these rings more times than I can count, I’ve picked up a few tricks that make a real difference. First, don’t skip the buttermilk soak—even 5 minutes makes the onions sweeter and helps the coating stick. If you’re short on time, you can skip the double-dredge, but the crust won’t be as thick or crunchy.
One mistake I made early on was not drying the onion rings after slicing. Wet onions make the flour clump and slide off. Pat them gently with a paper towel before you start dredging. Also, keep your oil temperature steady. If it drops below 325°F, the rings absorb too much oil and get greasy. If it goes above 375°F, the outside burns before the onion softens. Use that thermometer—it’s your best friend here.
Another tip: don’t coat all the rings at once before frying. The panko can get soggy if the rings sit too long. Coat a batch, fry it, then coat the next batch. This keeps everything fresh and crunchy. And if you’re making a big batch for a party, you can keep the finished rings warm in a 200°F oven on a wire rack for up to 20 minutes. They won’t be quite as crispy as fresh, but they’ll still be pretty darn good.
I’ve also learned that the sauce benefits from sitting for at least 10 minutes before serving. The flavors meld together and get more complex. If you can, make it ahead and let it chill in the fridge for an hour. It’s even better the next day.
Variations & Adaptations
This recipe is super flexible, so feel free to make it your own. Here are some variations I’ve tried and loved:
- Spicy Version: Add an extra teaspoon of cayenne to the flour mixture and a pinch of chili flakes to the panko. For the sauce, double the cayenne and add a dash of hot sauce. It’s got a serious kick.
- Gluten-Free Option: Swap the all-purpose flour for a gluten-free blend (like Bob’s Red Mill 1-to-1) and use gluten-free panko. The texture is slightly different but still very crispy.
- Baked Version: If you want to skip the deep-frying, arrange the coated rings on a wire rack over a baking sheet, spray generously with cooking oil, and bake at 425°F for 12-15 minutes, flipping halfway. They won’t be as crunchy as fried, but they’re still tasty and much lighter.
- Air Fryer Adaptation: Preheat your air fryer to 375°F. Spray the coated rings with oil and cook in a single layer for 6-8 minutes, flipping once. They come out surprisingly crispy with way less oil.
- Different Dipping Sauces: While the Canes-style sauce is amazing, you can also serve these with ranch, blue cheese, or a spicy sriracha mayo. I’ve even used leftover sauce from my crispy panko fried shrimp with bang bang sauce and it was incredible.
Serving & Storage Suggestions
These onion rings are best served hot and fresh, right after frying. Arrange them on a large platter with a bowl of the Canes-style sauce in the center. They’re perfect as an appetizer for game day, a side for burgers, or even a snack on their own. I love pairing them with a crispy hot honey chicken sandwich for the ultimate comfort food meal.
If you have leftovers (which is rare in my house), store them in an airtight container in the fridge for up to 2 days. But be warned—they will lose their crunch. To reheat, pop them in an air fryer at 375°F for 3-4 minutes, or spread them on a baking sheet and bake at 400°F for 5-7 minutes. The microwave will make them soggy, so avoid it if you can.
The sauce can be stored in a sealed jar in the fridge for up to a week. It actually gets better after a day or two as the flavors meld. I often double the sauce recipe just to have it on hand for dipping fries, chicken tenders, or even spreading on sandwiches.
Nutritional Information & Benefits
Here’s an approximate nutritional breakdown per serving (about 4-5 onion rings with 2 tablespoons of sauce):
- Calories: 320
- Fat: 18g
- Carbohydrates: 34g
- Protein: 6g
- Fiber: 2g
- Sugar: 6g
While these aren’t exactly health food, onions are a good source of vitamin C, fiber, and antioxidants. The buttermilk adds a little calcium and probiotics, and the panko provides a satisfying crunch without being overly heavy. If you’re watching your intake, the baked or air-fried versions cut the fat significantly. And the sauce, while made with mayo, is portion-controlled—just don’t go overboard on the dipping!
For those with dietary restrictions, this recipe can be made gluten-free with the swaps mentioned above. It’s also nut-free and egg-free if you use a flax egg in the buttermilk mixture (1 tablespoon ground flaxseed mixed with 3 tablespoons water). The cayenne adds a metabolism-boosting kick, and the smoked paprika gives you a dose of vitamin A.
Conclusion
These crispy onion rings with Canes-style sauce are the kind of recipe that feels like a treat but doesn’t require a trip to a restaurant. They’re crunchy, flavorful, and surprisingly easy to pull off at home. The double-dredge technique guarantees a crust that stays crisp, and the sauce is so good you’ll want to put it on everything. I’ve made these for parties, movie nights, and just because I had an onion that needed using—and they’ve never let me down.
I’d love to hear how yours turn out! Did you add extra spice? Try the air fryer version? Or maybe you discovered a new dipping sauce combination? Drop a comment below and let me know. And if you’re looking for more crispy snacks, don’t miss my crispy mozzarella fries with marinara and garlic aioli—they’re another crowd favorite. Happy frying!
Frequently Asked Questions
Can I use sweet onions instead of yellow onions?
Absolutely! Sweet onions like Vidalia or Walla Walla work beautifully. They’re milder and slightly sweeter, which makes for a more delicate flavor. Just keep in mind they might cook a little faster, so keep an eye on them while frying.
Why did my onion rings turn out greasy?
Greasy onion rings usually mean the oil wasn’t hot enough when you added them. Make sure your oil is at 350°F before frying, and don’t overcrowd the pot. Too many rings at once drop the temperature, causing them to absorb oil instead of frying quickly.
Can I make the sauce ahead of time?
Yes, and I actually recommend it! The sauce gets better as it sits. Make it up to 3 days in advance and store it in an airtight container in the fridge. Give it a good stir before serving.
How do I get the coating to stick better?
The double-dredge is key, but also make sure your onions are dry before you start. Pat them with a paper towel to remove excess moisture. And don’t skip the buttermilk soak—it helps the flour cling to the onion.
Can I freeze these onion rings?
You can freeze them after coating but before frying. Arrange the coated rings in a single layer on a baking sheet and freeze until solid, then transfer to a freezer bag. Fry directly from frozen, adding an extra minute to the cooking time. They won’t be quite as crispy as fresh, but they’re still delicious.
Pin This Recipe!
Best Crispy Onion Rings with Canes-Style Sauce Recipe
These crispy onion rings feature a shatteringly crunchy panko coating thanks to a double-dredge method, paired with a tangy, creamy Canes-style dipping sauce. Ready in under 30 minutes, they’re the perfect appetizer for game day or any gathering.
- Prep Time: 15 minutes
- Cook Time: 10 minutes
- Total Time: 25 minutes
- Yield: 4 servings 1x
- Category: Appetizer
- Cuisine: American
Ingredients
- 2 large yellow onions (or sweet onions like Vidalia)
- 1 cup buttermilk
- 1 large egg
- 1 cup all-purpose flour
- 1 teaspoon garlic powder
- 1 teaspoon smoked paprika
- 1/2 teaspoon cayenne pepper (optional)
- 1 teaspoon salt
- 1/2 teaspoon black pepper
- 2 cups panko breadcrumbs
- Vegetable oil or canola oil for frying (enough for 2 inches depth)
- 1/2 cup mayonnaise
- 1/4 cup ketchup
- 2 teaspoons Worcestershire sauce
- 1 teaspoon garlic powder
- 1 teaspoon smoked paprika
- 1/2 teaspoon cayenne pepper
- 1/2 teaspoon black pepper
- 1/2 teaspoon salt
- 1 teaspoon white vinegar
Instructions
- Slice the onions into 1/2-inch thick rings, separate gently, and discard papery skin. Set aside.
- In a shallow bowl, whisk together buttermilk and egg until smooth.
- In a second shallow bowl, combine flour, garlic powder, smoked paprika, cayenne (if using), salt, and black pepper.
- In a third shallow bowl, pour panko breadcrumbs.
- Double-dredge each ring: dip in buttermilk mixture, then flour, then back into buttermilk, then press into panko. Place coated rings on a parchment-lined baking sheet.
- Heat 2 inches of oil in a heavy-bottomed pot to 350°F (175°C).
- Fry 4-5 rings at a time for 2-3 minutes, flipping once, until golden brown. Drain on a wire rack or paper towels and sprinkle with salt.
- Whisk together all sauce ingredients (mayonnaise, ketchup, Worcestershire, garlic powder, smoked paprika, cayenne, black pepper, salt, white vinegar) in a small bowl.
- Serve rings immediately with sauce on the side.
Notes
For best results, pat onion rings dry before dredging. Keep oil temperature steady at 350°F. Coat rings in batches just before frying to prevent sogginess. Sauce benefits from resting 10 minutes or more.
Nutrition
- Serving Size: 4-5 onion rings with
- Calories: 320
- Sugar: 6
- Sodium: 680
- Fat: 18
- Saturated Fat: 3
- Carbohydrates: 34
- Fiber: 2
- Protein: 6
Keywords: crispy onion rings, Canes-style sauce, homemade onion rings, panko onion rings, game day appetizer