Love this? Save it for later!
Share the inspiration with your friends
The first time I made this crispy hot honey chicken sandwich, I was honestly just trying to use up leftover chicken thighs and a half-empty jar of honey that had been sitting in my pantry for months. It was one of those Tuesday nights where nothing was planned, and I was staring into the fridge hoping something would magically appear. Spoiler alert—it didn’t. But what did happen was way better. I had this sudden craving for something crunchy, something spicy, something that would make me forget the chaos of the day. So I grabbed my buttermilk, some flour, and that forgotten honey, and I started experimenting.
I remember standing over the stove, the oil sizzling, and thinking, “This is either going to be incredible or a complete disaster.” There’s no middle ground with fried chicken, you know? The first bite was honestly shocking. The crunch was so loud my husband actually looked up from his phone. And that sweet heat from the honey mixed with chili flakes? It hit exactly the right spot. I stood there in the kitchen, eating it straight off the cutting board, no bun, no toppings, just me and this ridiculous sandwich filling my entire world with happiness. That’s when I knew this recipe was special.
Now, I’ve made this crispy hot honey chicken sandwich more times than I can count. I’ve tweaked the spice level, tested different brines, and even tried baking it (which works, but let’s be real—frying is where the magic lives). Every single time, it delivers. It’s the kind of sandwich that makes you close your eyes after the first bite. And honestly? It never gets old.
Why You’ll Love This Recipe
Let me tell you why this crispy hot honey chicken sandwich has earned a permanent spot in my recipe rotation. It’s not just another fried chicken sandwich—it’s the one I reach for when I need comfort, when I’m cooking for friends, or when I just want something that feels like a hug on a bun.
- Crispy Perfection Every Time : The double-dredge method I use creates that shatteringly crunchy crust that stays crispy even after you add the sauce. No soggy breading here, I promise.
- Sweet Heat That’s Addictive : The hot honey glaze is the star of the show. It’s sticky, spicy, sweet, and completely irresistible. You’ll want to put it on everything after you try it.
- Simple Pantry Ingredients : No fancy grocery trips needed. You probably have most of these ingredients in your kitchen right now. Chicken, flour, buttermilk, honey, and some spices—that’s really all it takes.
- Perfect for Any Occasion : Game day, weeknight dinner, weekend indulgence, or when you just need to impress someone with minimal effort. This sandwich delivers every single time.
- Better Than Takeout : Honestly, once you make this at home, you’ll never want to order a fried chicken sandwich again. It’s fresher, crunchier, and way more satisfying.
What makes this recipe different from all the others? It’s the little things I’ve learned through trial and error. The buttermilk brine that tenderizes the chicken perfectly. The cornstarch in the flour mixture that guarantees extra crunch. And the hot honey that’s made from scratch with real honey and red pepper flakes—none of that store-bought stuff that tastes artificial. This is the version I’ve perfected over dozens of batches, and I’m so excited to share it with you.
This isn’t just a sandwich. It’s the kind of meal that turns a regular Tuesday into something worth remembering. And honestly, isn’t that what good food is supposed to do?
What Ingredients You Will Need
This crispy hot honey chicken sandwich uses simple, wholesome ingredients to deliver bold flavor and satisfying texture without the fuss. Most of these are pantry staples, but I’ve included a few notes to help you pick the best options.
- Boneless, skinless chicken thighs (4 pieces) – Thighs are juicier and more forgiving than breasts. They stay tender even after frying. If you prefer breasts, use 2 large ones and slice them in half horizontally.
- Buttermilk (1 cup) – This is the secret to tender chicken. The acidity breaks down the proteins and keeps the meat moist. No buttermilk? Add 1 tablespoon of lemon juice or vinegar to regular milk and let it sit for 5 minutes.
- All-purpose flour (1½ cups) – The base of our crispy coating. I’ve tested this with gluten-free flour blends and they work, but all-purpose gives the best crunch.
- Cornstarch (½ cup) – This is non-negotiable for extra crispy chicken. It lightens the coating and creates that shatter effect when you bite into it.
- Paprika (2 teaspoons) – Adds color and a mild smoky flavor. I use sweet paprika, but smoked paprika works beautifully too.
- Garlic powder (1 teaspoon) – Essential for savory depth. Fresh garlic burns during frying, so stick with the powder.
- Onion powder (1 teaspoon) – Rounds out the savory profile. Don’t skip it—it makes a difference.
- Cayenne pepper (½ teaspoon) – Adds a subtle kick to the breading. Adjust based on your heat tolerance.
- Salt and black pepper (to taste) – Season generously. The coating needs enough salt to flavor the entire sandwich.
- Honey (½ cup) – Use real honey, not the fake stuff in plastic bears. Local honey adds floral notes that are amazing with the heat.
- Red pepper flakes (1-2 teaspoons) – This creates the “hot” in hot honey. I use 1½ teaspoons for a medium heat that builds slowly.
- Apple cider vinegar (1 tablespoon) – Balances the sweetness of the honey and adds brightness to the glaze.
- Vegetable oil (for frying, about 4 cups) – Use a neutral oil with a high smoke point like canola, peanut, or avocado oil.
- Brioche buns (4) – Soft, buttery buns are perfect for this sandwich. Toast them lightly so they hold up to the juicy chicken and sauce.
- Pickles (dill pickle slices) – The tangy crunch cuts through the richness. I use bread-and-butter pickles for extra sweetness, but dill works great too.
- Shredded lettuce (optional) – Adds freshness and crunch. I prefer iceberg or romaine for their crisp texture.
Equipment Needed
You don’t need a professional kitchen to make this crispy hot honey chicken sandwich, but having the right tools makes the process smoother and safer. Here’s what I use every time.
- Large cast-iron skillet or heavy-bottomed pot – Cast iron retains heat beautifully and gives you consistent frying temperatures. A Dutch oven works just as well.
- Deep-fry thermometer – This is crucial for maintaining the right oil temperature. Trust me, I’ve ruined plenty of batches by guessing.
- Two shallow bowls or pie plates – One for the buttermilk mixture, one for the flour coating. This makes the dredging process efficient and less messy.
- Tongs – For safely lowering chicken into hot oil and flipping it. Long ones keep your hands away from splattering oil.
- Wire rack set over a baking sheet – This keeps the fried chicken crispy instead of soggy. Paper towels work in a pinch, but a wire rack is way better.
- Small saucepan – For making the hot honey glaze. A non-stick one is easiest to clean.
- Meat mallet or rolling pin – For pounding chicken thighs to even thickness. This ensures they cook evenly.
- Mixing bowls – Various sizes for brining, mixing, and glazing.
- Pastry brush – For brushing the hot honey glaze onto the chicken. A spoon works too, but a brush gives you even coverage.
Preparation Method
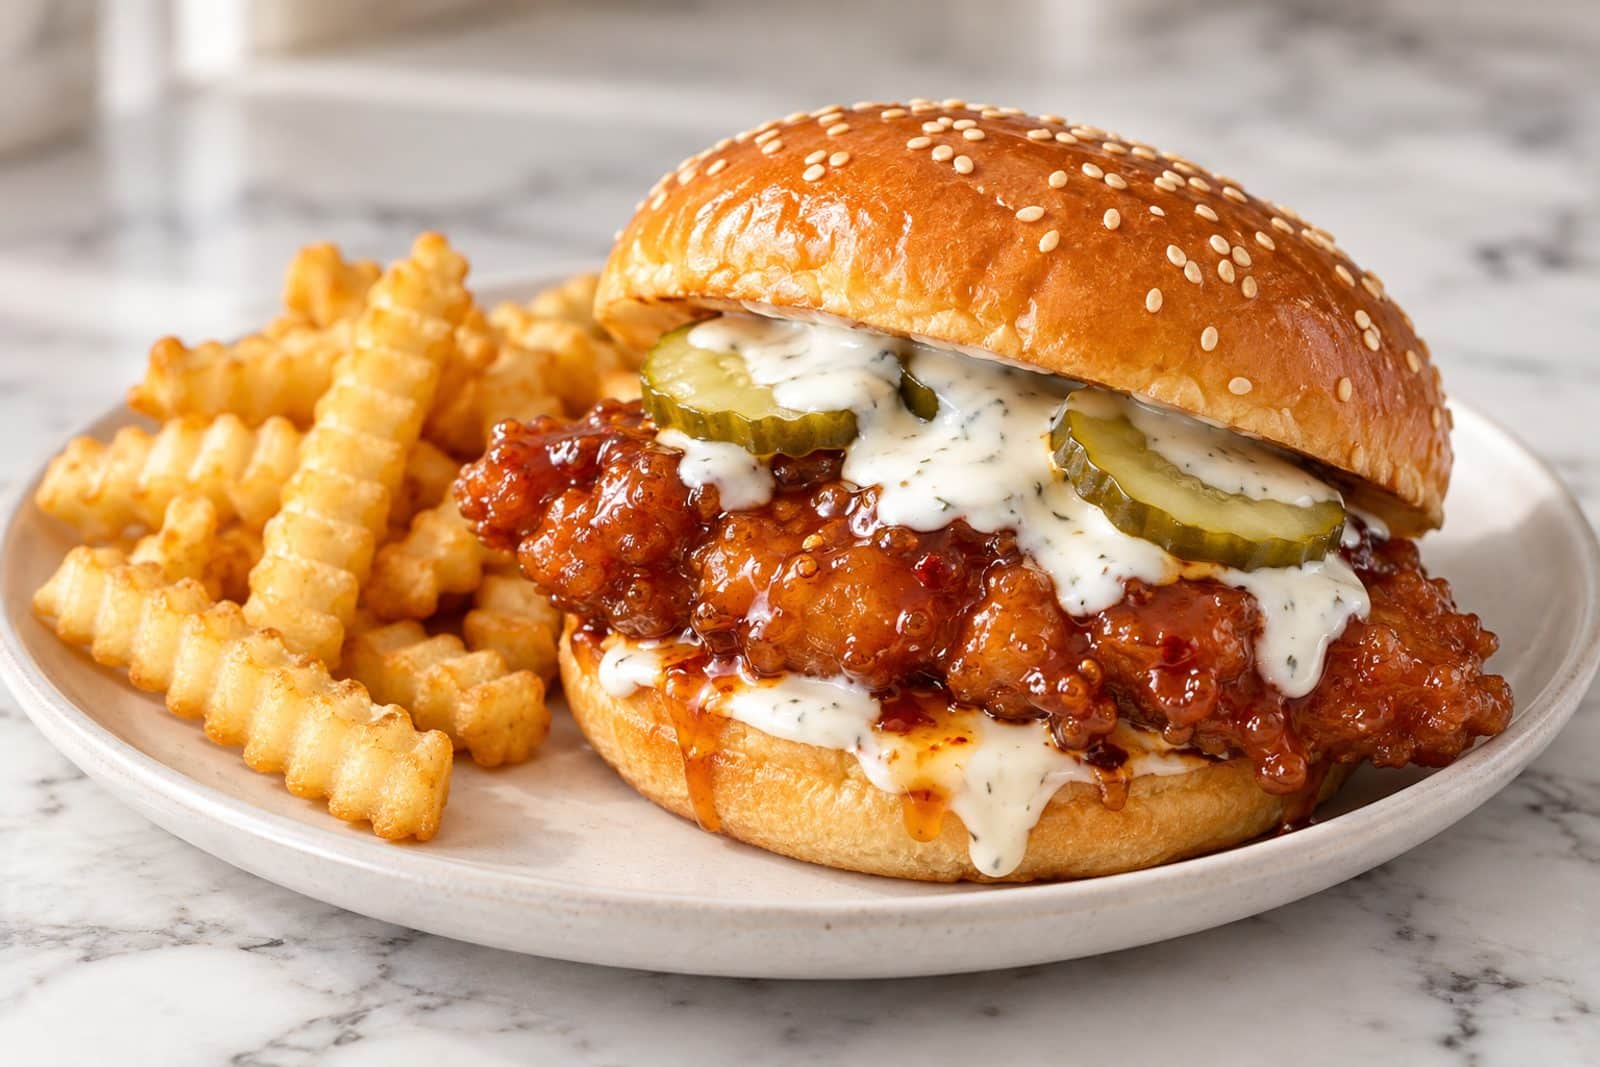
Let’s walk through this step by step. I’ve included all the little details I’ve learned from making this crispy hot honey chicken sandwich more times than I can count.
- Brine the chicken – Place your chicken thighs in a bowl and cover them with buttermilk. Add a pinch of salt and pepper. Cover and refrigerate for at least 2 hours, but overnight is even better. This step makes the chicken incredibly tender and flavorful. If you’re short on time, 30 minutes still helps.
- Prepare the dry coating – In a shallow bowl, whisk together the all-purpose flour, cornstarch, paprika, garlic powder, onion powder, cayenne pepper, 1 teaspoon of salt, and ½ teaspoon of black pepper. The cornstarch is the secret to that extra crispy texture—don’t skip it.
- Set up your dredging station – Remove the chicken from the buttermilk, letting the excess drip off. Working with one piece at a time, coat the chicken thoroughly in the flour mixture. Press the flour into the chicken firmly—this creates those craggy, crispy bits that are the best part. Place the coated chicken on a wire rack and let it rest for 10 minutes. This helps the coating adhere better during frying.
- Heat the oil – Pour about 2 inches of vegetable oil into your cast-iron skillet or heavy pot. Heat over medium-high heat until it reaches 350°F (175°C). Use your deep-fry thermometer to monitor the temperature. If you don’t have one, drop a pinch of flour into the oil—if it sizzles immediately, you’re ready.
- Fry the chicken – Carefully lower the chicken pieces into the hot oil using tongs. Don’t overcrowd the pan—work in batches if needed. Fry for 5-6 minutes per side, until golden brown and the internal temperature reaches 165°F (74°C). The chicken should be deep golden and incredibly crispy. Transfer to a wire rack to drain excess oil.
- Make the hot honey glaze – While the chicken fries, combine the honey, red pepper flakes, and apple cider vinegar in a small saucepan. Heat over medium-low heat, stirring occasionally, until the honey is loose and the pepper flakes are infused. This takes about 3-4 minutes. Taste and adjust the heat level by adding more pepper flakes if you want it spicier.
- Glaze the chicken – Using a pastry brush, generously brush the hot honey glaze over both sides of each fried chicken piece while it’s still warm. The heat from the chicken helps the glaze soak in and creates that sticky, irresistible coating.
- Toast the buns – Split your brioche buns and toast them in a dry skillet or on a griddle until golden brown. This step is important—toasted buns hold up better to the juicy chicken and sauce.
- Assemble the sandwiches – Place a generous handful of shredded lettuce on the bottom bun. Add a few pickle slices for tangy crunch. Place the glazed chicken on top. Add the top bun and press down gently. Serve immediately while the chicken is still hot and crispy.
Cooking Tips & Techniques
I’ve made every mistake in the book with fried chicken sandwiches, so let me save you some trouble. These tips come straight from my kitchen disasters and triumphs.
Temperature control is everything. When the oil is too cold, the chicken absorbs oil and becomes greasy. When it’s too hot, the outside burns before the inside cooks. Keep that oil steady at 350°F (175°C). I check my thermometer every few minutes and adjust the heat as needed. If you see the oil smoking, it’s too hot—pull it off the heat immediately.
Don’t skip the rest after dredging. Letting the coated chicken sit on a wire rack for 10 minutes before frying is a game-changer. It allows the flour mixture to hydrate and adhere to the chicken, which means less breading falling off in the oil. I learned this the hard way after fishing sad, breading-less chicken out of my oil.
Work in batches. Crowding the pan drops the oil temperature too quickly, and you end up with soggy, unevenly cooked chicken. Fry 2-3 pieces at a time depending on your pan size. Let the oil come back to 350°F between batches.
Use a wire rack, not paper towels. When you place fried chicken on paper towels, the steam gets trapped and softens the crust. A wire rack allows air to circulate around the chicken, keeping it crispy for much longer. I have two wire racks that I use exclusively for frying.
Double glaze for maximum flavor. Brush the hot honey on both sides of the chicken, then let it sit for a minute, and brush on a second layer. The extra coating makes the sandwich incredibly flavorful and gives it that beautiful glossy finish.
Variations & Adaptations
One of the best things about this crispy hot honey chicken sandwich is how versatile it is. Here are some of my favorite ways to change it up.
Spicy Nashville Hot Style – Skip the honey glaze and instead toss the fried chicken in a mixture of melted butter, cayenne pepper, brown sugar, and paprika. This gives you that classic Nashville hot chicken experience with a slightly sweet twist. Serve with white bread and pickles for authenticity.
Buffalo Ranch Version – Replace the hot honey with buffalo sauce (melted butter mixed with hot sauce) and drizzle with ranch dressing. Add blue cheese crumbles for extra tang. This is my go-to for game day gatherings.
Honey Garlic Soy – Add 2 tablespoons of soy sauce and 1 teaspoon of minced garlic to the hot honey mixture. The savory umami balances the sweetness beautifully. Top with sesame seeds and sliced green onions for an Asian-inspired twist.
Healthier Baked Version – If you want to skip the frying, coat the chicken in the same flour mixture and bake at 400°F (200°C) for 20-25 minutes, flipping halfway through. Brush with the hot honey glaze during the last 5 minutes of baking. It’s not as crispy as fried, but it’s still delicious and much lighter.
Spicy Mayo Spread – Mix ¼ cup mayonnaise with 1 tablespoon of sriracha and 1 teaspoon of lime juice. Spread this on both sides of the bun before assembling. The creamy heat adds another layer of flavor that complements the sweet hot honey.
Serving & Storage Suggestions
This crispy hot honey chicken sandwich is best served immediately while the chicken is still hot and the bun is toasted. But if you have leftovers (which rarely happens in my house), here’s how to handle them.
Serving Suggestions – Serve the sandwiches with a side of crispy fries, sweet potato wedges, or a simple coleslaw. The tangy coleslaw cuts through the richness of the fried chicken perfectly. For a lighter option, pair it with a fresh green salad with a citrus vinaigrette.
Storage – Store leftover fried chicken separately from the buns and toppings. Place the chicken in an airtight container and refrigerate for up to 3 days. The hot honey glaze will soften the crust over time, so it won’t be as crispy when reheated, but the flavor is still amazing.
Reheating – The best way to revive leftover fried chicken is in an air fryer at 375°F (190°C) for 3-4 minutes. You can also reheat it in a 400°F (200°C) oven on a wire rack for 8-10 minutes. Avoid the microwave—it turns the crispy coating into a sad, soggy mess.
Freezing – You can freeze the fried chicken (without glaze) for up to 2 months. Place the cooled chicken pieces on a baking sheet and freeze until solid, then transfer to a freezer bag. When ready to use, reheat in the oven or air fryer, then brush with fresh hot honey glaze.
Nutritional Information & Benefits
Let’s be real—this is an indulgent sandwich, and that’s totally okay. But here’s some information to help you make informed choices.
One crispy hot honey chicken sandwich (with bun and toppings) contains approximately 650-750 calories, 35g of protein, 45g of carbohydrates, and 35g of fat. The exact numbers depend on your specific ingredients and frying method.
The chicken provides high-quality protein that keeps you full and satisfied. Honey contains antioxidants and has antibacterial properties, while the cayenne pepper can boost metabolism and reduce inflammation. The buttermilk brine adds calcium and helps tenderize the meat without added fat.
If you’re watching your calories, you can reduce the oil absorption by using a thermometer to maintain proper frying temperature. You can also use an air fryer for a lighter version—the texture won’t be exactly the same, but it’s still delicious.
This recipe contains gluten (from the flour and buns) and dairy (from the buttermilk). For a gluten-free version, use a gluten-free flour blend and gluten-free buns. For a dairy-free option, use almond milk with lemon juice instead of buttermilk.
Conclusion
This crispy hot honey chicken sandwich has become one of those recipes that my family requests constantly. It’s the kind of meal that makes everyone gather around the kitchen counter, waiting impatiently for the first bite. The combination of crunchy, juicy chicken with that sweet, spicy, sticky honey glaze is honestly unbeatable.
I love that this recipe is forgiving enough for beginners but impressive enough for experienced cooks. You can customize the heat level, switch up the toppings, and make it your own. That’s what cooking is all about—taking a basic idea and turning it into something that feels personal and special.
I’d love to hear how your crispy hot honey chicken sandwich turns out! Drop a comment below and let me know what variations you tried, or tag me in your photos on social media. Did you add extra spice? Try a different bun? Make it for a crowd? Share your experience—it makes my day to see these sandwiches being enjoyed in kitchens everywhere.
Now go make some magic in your kitchen. You’ve got this!
Frequently Asked Questions
Can I use chicken breast instead of thighs?
Absolutely! Chicken breasts work well, but they can dry out more easily. Slice large breasts in half horizontally to create thinner cutlets that cook evenly. Pound them to an even thickness of about ½ inch for best results. The buttermilk brine helps keep them moist, so don’t skip that step.
How do I make the hot honey less spicy?
Simply reduce the amount of red pepper flakes in the glaze. Start with ½ teaspoon and taste as you go. You can also remove the pepper flakes after heating if you want the flavor without the heat. For a completely mild version, skip the cayenne in the breading too.
Can I make this recipe in an air fryer?
Yes! Spray the coated chicken with cooking spray and air fry at 375°F (190°C) for 12-15 minutes, flipping halfway through. The texture won’t be as shatteringly crispy as deep-fried, but it’s a great lighter alternative. Brush with hot honey glaze during the last 2 minutes.
What’s the best oil for frying chicken?
Use a neutral oil with a high smoke point like peanut oil, canola oil, or vegetable oil. Peanut oil is my personal favorite because it adds a subtle nutty flavor and handles high heat beautifully. Avoid olive oil—it burns too easily at frying temperatures.
How do I keep the chicken crispy after glazing?
Brush the hot honey glaze on right before serving and don’t overdo it. A thin, even layer is all you need. If you’re making multiple sandwiches, glaze each one individually as you serve them. This prevents the coating from getting soggy from sitting in the glaze too long.
Pin This Recipe!
Best Crispy Hot Honey Chicken Sandwich Recipe

This crispy hot honey chicken sandwich features shatteringly crunchy fried chicken thighs coated in a sweet and spicy homemade hot honey glaze. Perfect for weeknight dinners or game day, it’s a crowd-pleaser that’s better than takeout.
- Prep Time: 15 minutes
- Cook Time: 30 minutes
- Total Time: 45 minutes
- Yield: 4 servings 1x
- Category: Main Course
- Cuisine: American
Ingredients
- 4 boneless, skinless chicken thighs
- 1 cup buttermilk
- 1½ cups all-purpose flour
- ½ cup cornstarch
- 2 teaspoons paprika
- 1 teaspoon garlic powder
- 1 teaspoon onion powder
- ½ teaspoon cayenne pepper
- Salt and black pepper to taste
- ½ cup honey
- 1–2 teaspoons red pepper flakes
- 1 tablespoon apple cider vinegar
- Vegetable oil for frying (about 4 cups)
- 4 brioche buns
- Dill pickle slices
- Shredded lettuce (optional)
Instructions
- Brine the chicken: Place chicken thighs in a bowl, cover with buttermilk, add a pinch of salt and pepper. Cover and refrigerate for at least 2 hours or overnight.
- Prepare the dry coating: In a shallow bowl, whisk together flour, cornstarch, paprika, garlic powder, onion powder, cayenne pepper, 1 teaspoon salt, and ½ teaspoon black pepper.
- Set up dredging station: Remove chicken from buttermilk, letting excess drip off. Coat each piece thoroughly in flour mixture, pressing firmly. Place on a wire rack and let rest for 10 minutes.
- Heat the oil: Pour about 2 inches of vegetable oil into a cast-iron skillet or heavy pot. Heat over medium-high heat to 350°F (175°C).
- Fry the chicken: Carefully lower chicken into hot oil using tongs. Fry in batches for 5-6 minutes per side until golden brown and internal temperature reaches 165°F (74°C). Transfer to a wire rack.
- Make the hot honey glaze: In a small saucepan, combine honey, red pepper flakes, and apple cider vinegar. Heat over medium-low heat for 3-4 minutes, stirring occasionally.
- Glaze the chicken: Using a pastry brush, generously brush hot honey glaze over both sides of each fried chicken piece while still warm.
- Toast the buns: Split brioche buns and toast in a dry skillet or on a griddle until golden brown.
- Assemble the sandwiches: Place shredded lettuce on bottom bun, add pickle slices, place glazed chicken on top, and add top bun. Serve immediately.
Notes
Temperature control is crucial: keep oil at 350°F. Let coated chicken rest for 10 minutes before frying to help breading adhere. Use a wire rack instead of paper towels to keep chicken crispy. Double glaze for maximum flavor.
Nutrition
- Serving Size: 1 sandwich
- Calories: 700
- Sugar: 20
- Sodium: 800
- Fat: 35
- Saturated Fat: 8
- Carbohydrates: 45
- Fiber: 2
- Protein: 35
Keywords: crispy hot honey chicken sandwich, fried chicken sandwich, hot honey chicken, chicken sandwich recipe, homemade chicken sandwich