Love this? Save it for later!
Share the inspiration with your friends
I was standing in my kitchen at 5:47 PM, staring into the fridge like it owed me money. The ground beef I’d defrosted that morning sat there, and I had exactly zero energy for anything complicated. My kids were already doing that thing where they circle the kitchen island asking what’s for dinner, and honestly, I was this close to ordering takeout. But then I spotted the corn tortillas, a block of cheddar, and that half-used jar of salsa. And I thought—what if I just… pan-fried the whole situation?
That first batch came out louder than I expected. The sizzle when the tortilla hit the hot oil was so aggressive I actually stepped back. But the smell—that toasty, cheesy, beefy smell—made everyone wander into the kitchen. I flipped one, saw that golden brown crust, and knew I was onto something. By the time I plated them, my youngest had already grabbed one off the stack. He didn’t even wait for sour cream.
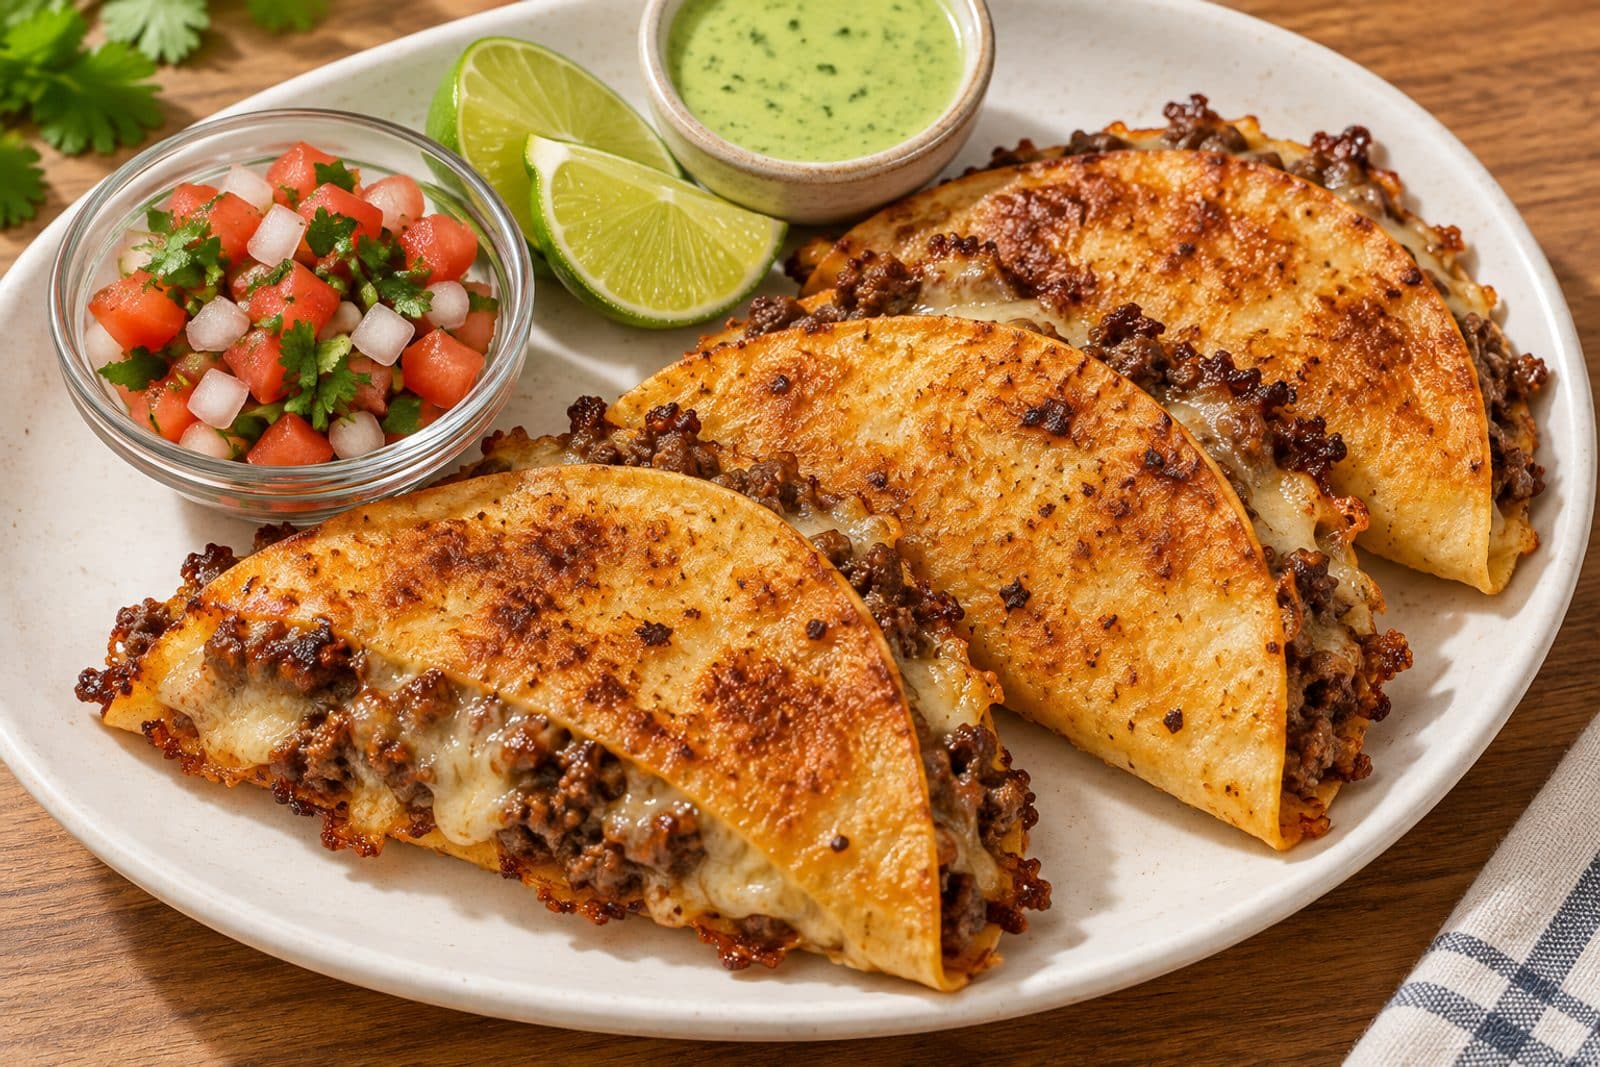
These crispy cheesy beef tacos weren’t planned. They were born from a tired Wednesday and a fridge that was just cooperative enough. And now? They’re the dinner I make when I need something fast that still feels like a win. No complicated steps, no fancy ingredients—just crunchy, melty, beefy goodness that comes together in under 30 minutes.
Why You’ll Love This Recipe
Let me tell you why these crispy cheesy beef tacos have become my go-to weeknight hero. I’ve tested this method at least a dozen times—sometimes with different cheeses, once with ground turkey (which worked, by the way), and even during a power outage using a camping stove. Every single time, they delivered.
- Quick & Easy: From fridge to table in about 25 minutes. No marinating, no waiting, no complicated steps. Just brown the beef, assemble, and fry.
- Simple Ingredients: You probably have most of this in your kitchen right now. Ground beef, tortillas, cheese, taco seasoning—that’s basically it.
- Perfect for Busy Weeknights: When you’re tired and hungry and the kids are cranky, this is the dinner that saves the day. It’s fast enough for a Tuesday but good enough that guests will ask for the recipe.
- Crowd-Pleaser: My picky eater, my husband who “doesn’t love tacos,” and my mother-in-law who critiques everything all gave these two thumbs up. The crispy exterior wins everyone over.
- Unbelievably Delicious: That contrast between the crunchy, golden shell and the gooey, melted cheese inside? It’s next-level comfort food. The first bite always makes me close my eyes.
What makes these different from regular tacos is the technique. Instead of filling a soft shell, you’re creating a sealed, crispy package where the cheese acts like edible glue. The tortilla gets fried until it shatters when you bite into it, and the beef stays juicy inside. It’s taco night, but better.
What Ingredients You Will Need
This recipe keeps things simple. You don’t need a specialty grocery store or weird ingredients. Just honest, real food that works together beautifully.
For the Beef Filling
- 1 pound ground beef (80/20 works best—the fat keeps it juicy; leaner blends work too, just add a splash of oil)
- 1 tablespoon olive oil (for cooking the beef)
- 1 small onion, finely diced (about half a cup; yellow or white onion both work)
- 2 cloves garlic, minced (fresh is best, but jarred minced garlic works in a pinch)
- 2 tablespoons taco seasoning (store-bought is fine; I use the low-sodium kind so I can control the salt)
- 1/4 cup water (helps the seasoning distribute evenly)
- Salt and black pepper to taste
For the Taco Assembly
- 12 small corn tortillas (white or yellow corn both work; make sure they’re pliable—if they crack, warm them slightly in the microwave)
- 2 cups shredded cheddar cheese (or Monterey Jack, or a Mexican blend—shred it yourself for better melting)
- 3 tablespoons vegetable oil (for frying; use a neutral oil with a high smoke point like canola or avocado oil)
For Topping (Optional but Recommended)
- Sour cream
- Salsa or pico de gallo
- Fresh cilantro, chopped
- Lime wedges
- Hot sauce (I like Cholula or Valentina)
Ingredient Note: I’ve tested this with flour tortillas and it works, but corn tortillas get significantly crispier. If you’re gluten-free, corn tortillas are naturally the way to go. For the cheese, I really recommend shredding it yourself—pre-shredded cheese has anti-caking agents that prevent it from melting as smoothly.
Equipment Needed
You don’t need much for this recipe, which is part of the beauty. Here’s what you’ll want:
- Large non-stick skillet (12-inch works best; you can fit 3-4 tacos at a time)
- Medium skillet or saucepan (for browning the beef)
- Spatula (a thin metal one works best for flipping the tacos)
- Cutting board and sharp knife (for dicing the onion and mincing garlic)
- Measuring spoons
- Paper towels (for draining excess oil)
- Serving platter
If you don’t have a non-stick skillet, a well-seasoned cast iron pan works beautifully too—just make sure it’s hot enough before adding the oil. I’ve also made these on an electric griddle when cooking for a crowd, and they came out perfectly crispy.
Preparation Method
Let’s make these crispy cheesy beef tacos. I’ll walk you through every step so you get that perfect golden crust.
Step 1: Cook the Beef Filling
Heat the olive oil in your medium skillet over medium-high heat. Add the diced onion and cook for about 3 minutes until it’s soft and translucent. Add the minced garlic and cook for another 30 seconds until fragrant. Add the ground beef, breaking it apart with a wooden spoon. Cook for 5-6 minutes until browned and no longer pink. Drain off any excess fat if needed (I leave about a tablespoon for flavor).
Sprinkle the taco seasoning over the beef, add the water, and stir everything together. Let it simmer for 2-3 minutes until the liquid thickens slightly. Taste and add salt and pepper if needed. Set the beef aside in a bowl. You’ll see it’s seasoned perfectly—not too wet, not too dry.
Step 2: Prepare the Tortillas
If your corn tortillas are stiff or cracking at the edges, wrap them in a damp paper towel and microwave for 20-30 seconds. This makes them pliable and easier to fold. Work with one tortilla at a time. Lay it flat on your cutting board.
Step 3: Assemble the Tacos
Sprinkle about 2 tablespoons of shredded cheese on one half of the tortilla. Top with about 2 tablespoons of the seasoned beef. Add another tablespoon of cheese on top of the beef. Fold the empty half of the tortilla over the filling, pressing down gently to create a half-moon shape. The cheese will act like glue to hold everything together.
Pro tip: Don’t overfill! Too much filling will make the tacos burst open during frying. You want a snug, flat package that stays sealed.
Step 4: Fry the Tacos
Heat your large non-stick skillet over medium heat and add enough vegetable oil to coat the bottom (about 2 tablespoons). Let the oil get hot—you’ll know it’s ready when a tiny piece of tortilla sizzles immediately.
Carefully place 3-4 assembled tacos in the skillet, seam-side down. Cook for 2-3 minutes until the bottom is golden brown and crispy. Use your spatula to gently flip each taco. Cook for another 2-3 minutes on the second side until golden brown and the cheese is fully melted and oozing slightly at the edges.
Transfer the cooked tacos to a plate lined with paper towels to drain excess oil. Repeat with the remaining tacos, adding more oil to the pan as needed. You should get about 12 tacos total.
Step 5: Serve Immediately
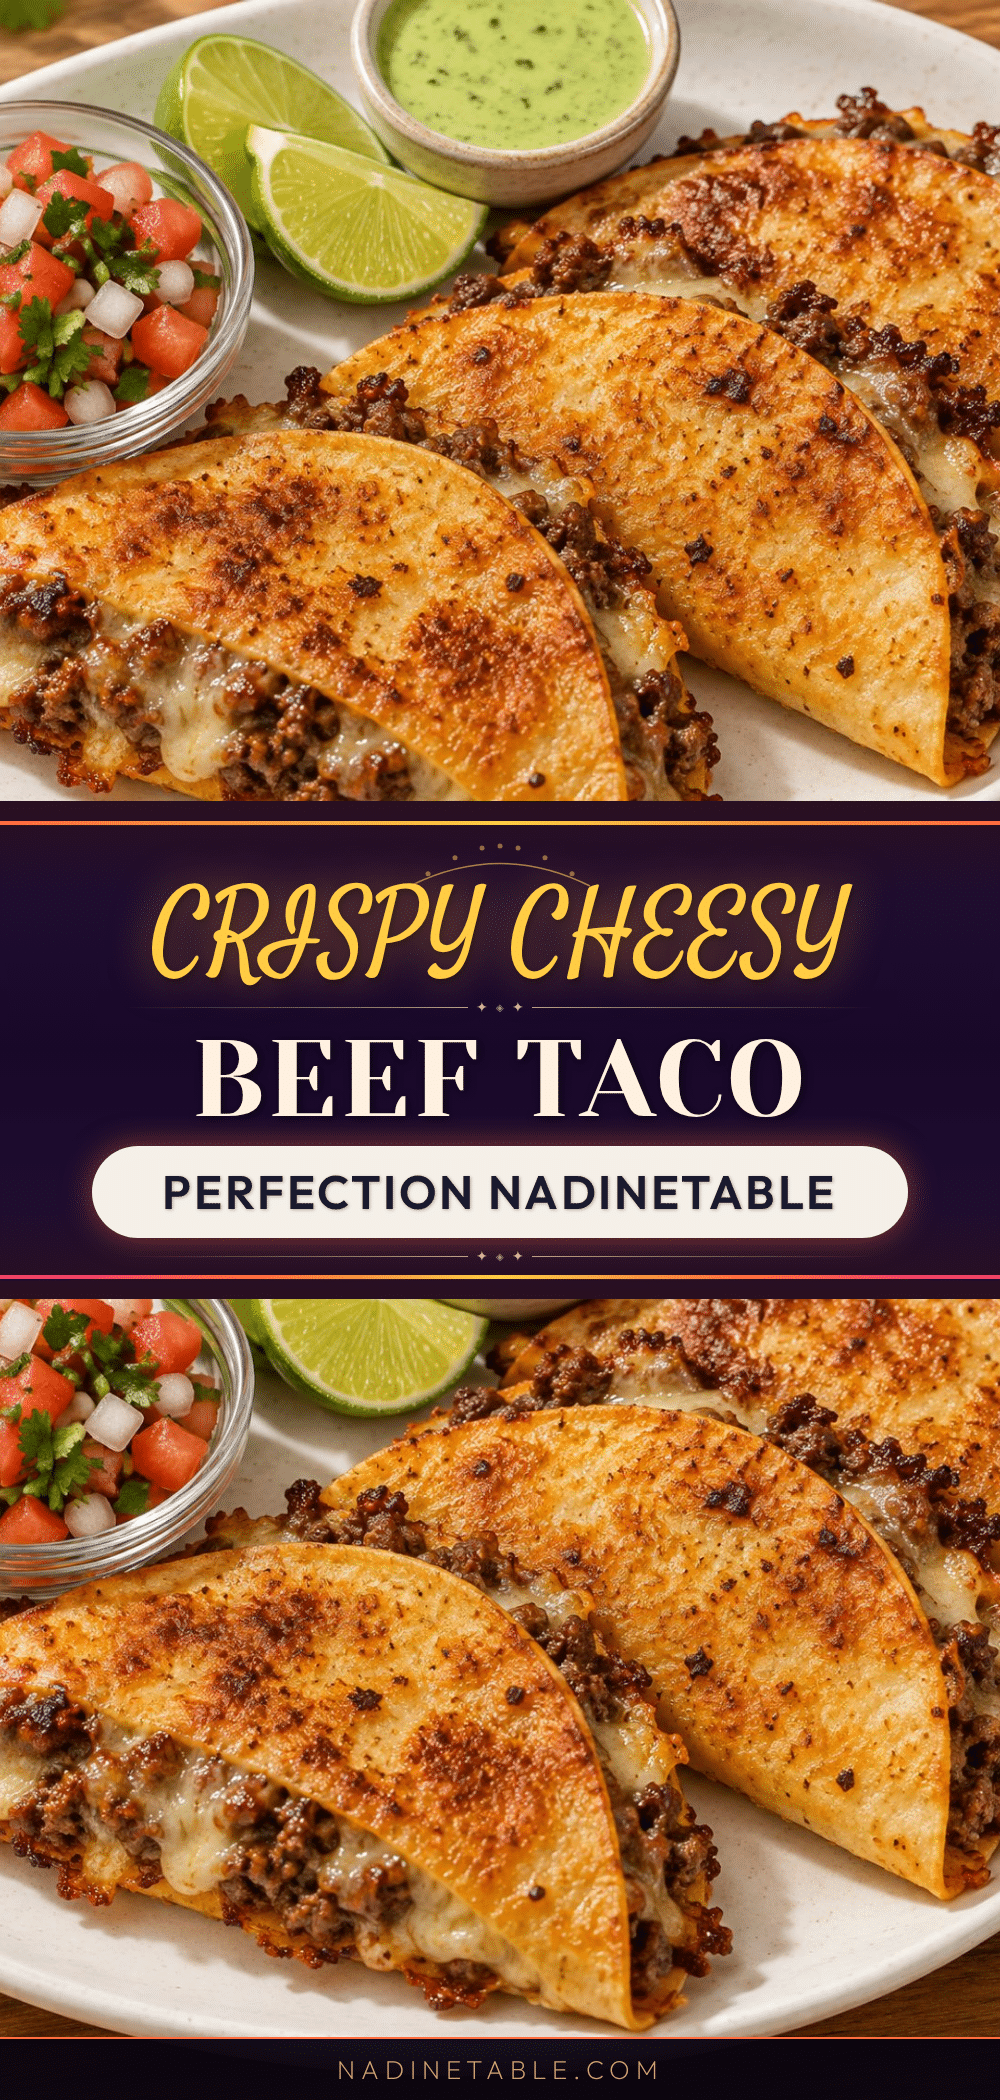
These are best eaten right away while they’re still hot and crispy. Arrange them on a platter, add your favorite toppings, and watch them disappear. The contrast between the crunchy shell and the gooey cheese inside is pure magic.
Cooking Tips & Techniques
I’ve made these crispy cheesy beef tacos more times than I can count, and I’ve learned a few things along the way. Let me save you from my mistakes.
Don’t skip the cheese glue. The cheese on both sides of the beef isn’t just for flavor—it’s structural. When it melts, it bonds the tortilla shut, preventing the filling from falling out during frying. I learned this the hard way when I made tacos that exploded open in the pan. Trust me on this one.
Medium heat is your friend. I know it’s tempting to crank up the heat for faster cooking, but high heat will burn the tortilla before the cheese inside has a chance to melt. Medium heat gives you that golden brown exterior with perfectly melted cheese inside. If you’re not sure, do a test taco first.
Don’t crowd the pan. Each taco needs space to crisp up properly. If you overcrowd, they’ll steam instead of fry, and you’ll end up with soggy tacos. Work in batches of 3-4 and keep the cooked ones warm in a 200°F oven if needed.
Use a thin spatula. A thick spatula will squish the tacos when you try to flip them. A thin, flexible metal spatula slides right under the crispy tortilla without breaking it. If you don’t have one, use two spatulas—one to hold the taco steady and one to flip.
Patience with the first flip. Wait until the bottom is deeply golden before flipping. If you flip too early, the cheese hasn’t set and the filling will spill out. You’ll hear a satisfying sizzle when they’re ready.
Variations & Adaptations
One of the best things about this recipe is how flexible it is. Here are some ways I’ve adapted it over the years:
Spicy Version
Add 1-2 diced jalapeños to the beef while cooking, or mix in a tablespoon of chipotle peppers in adobo sauce. For extra heat, use pepper jack cheese instead of cheddar. My husband loves this version with extra hot sauce on top.
Healthier Twist
Swap the ground beef for ground turkey or chicken. Use 93/7 lean turkey and add a tablespoon of olive oil to keep it moist. You can also use low-fat cheese and bake the tacos at 400°F for 10-12 minutes instead of frying. They won’t be as crispy, but they’ll still be delicious.
Vegetarian Option
Replace the beef with 1 can of black beans (drained and rinsed) plus 1 cup of corn kernels. Mash the beans slightly with a fork before seasoning. The texture is different, but the flavor is fantastic. My vegetarian friend requests these every time she visits.
Breakfast Tacos
Use the same technique but fill with scrambled eggs, crumbled sausage, and cheese. They’re incredible for brunch or a quick breakfast-for-dinner night. I’ve made these for weekend mornings and they always disappear fast.
Different Cheese Options
While cheddar is classic, I’ve also used Monterey Jack (melts beautifully), pepper jack (for spice lovers), or a blend of queso fresco and mozzarella. Each gives a slightly different texture and flavor profile.
Serving & Storage Suggestions
These crispy cheesy beef tacos are best served immediately, but I’ve got tips for every situation.
Serving: Arrange the hot tacos on a platter with bowls of sour cream, salsa, fresh cilantro, and lime wedges. Let everyone customize their own. They’re also great with a side of Mexican rice or a simple avocado salad. If you’re looking for another easy weeknight option, check out this creamy one pan chicken fajita pasta for a different kind of dinner win.
Storage: If you have leftovers (unlikely, but possible), let them cool completely. Store in an airtight container in the refrigerator for up to 3 days. The tacos will soften, but they’re still tasty.
Reheating: The best way to reheat is in a skillet over medium heat for 2-3 minutes per side. This restores some of the crispiness. You can also use an air fryer at 350°F for 3-4 minutes. Skip the microwave—it makes them soggy.
Freezing: Assemble the tacos but don’t fry them. Place them in a single layer on a baking sheet and freeze until solid. Transfer to a freezer bag and store for up to 3 months. Fry directly from frozen, adding 1-2 minutes to the cooking time. This is a lifesaver for meal prep.
Nutritional Information & Benefits
Here’s the approximate nutritional breakdown per taco (based on 12 tacos, using 80/20 beef and cheddar cheese):
- Calories: 210
- Protein: 12g
- Fat: 14g
- Carbohydrates: 12g
- Fiber: 2g
- Sugar: 1g
Health Benefits: Corn tortillas are naturally gluten-free and provide complex carbohydrates for sustained energy. Ground beef is an excellent source of iron, zinc, and B vitamins. Cheese adds calcium and protein. If you want to lighten things up, serve with a fresh salsa instead of sour cream. For another balanced meal idea, this cozy fall quinoa salad pairs beautifully alongside these tacos.
Dietary Considerations: This recipe is naturally gluten-free when using corn tortillas. For a lower-fat version, use lean ground beef and reduced-fat cheese. To reduce sodium, use homemade taco seasoning or a low-sodium store-bought blend.
Conclusion
These crispy cheesy beef tacos have become a staple in my kitchen for good reason. They’re fast, they’re satisfying, and they make everyone at the table happy. That first bite—where the crunchy shell gives way to melted cheese and seasoned beef—never gets old. It’s the kind of dinner that makes a regular Tuesday feel a little bit special.
I hope you try them and make them your own. Add your favorite toppings, experiment with different fillings, and don’t be afraid to double the batch. If you’re a fan of crispy, cheesy goodness, you might also love these crispy cheesy beef tortilla pockets for another quick meal idea.
I’d love to hear how yours turn out! Drop a comment below and let me know what variations you tried, or share a photo of your tacos. Don’t forget to pin this recipe for later and share it with a friend who needs an easy weeknight win. Happy cooking!
Frequently Asked Questions
Can I make these in an air fryer?
Yes! Preheat your air fryer to 375°F. Lightly spray the assembled tacos with cooking oil and place them in a single layer in the basket. Cook for 6-8 minutes, flipping halfway through, until golden and crispy.
How do I prevent the tacos from opening during frying?
Make sure you use enough cheese to act as glue—about 3 tablespoons total per taco. Press down gently on the folded tortilla before placing it in the pan, and cook seam-side down first to seal it shut.
Can I use flour tortillas instead of corn?
You can, but they won’t get as crispy. Flour tortillas absorb more oil and stay softer. If you use flour, cook them a little longer on each side and expect a less shatter-crunchy texture.
What’s the best cheese for melting?
Monterey Jack and cheddar are top choices because they melt smoothly and have good flavor. Avoid very hard cheeses like Parmesan or very soft cheeses like fresh mozzarella, which can become rubbery or watery.
Can I prep these ahead of time for a party?
Absolutely! Assemble the tacos up to 24 hours in advance and keep them covered in the refrigerator. Fry them just before serving. You can also fry them completely and reheat in a 350°F oven for 5-7 minutes to restore crispiness.
If you’re looking for another crispy, cheesy appetizer for your next gathering, these crispy cheesy potato croquettes are always a hit too.
Pin This Recipe!
Easy Crispy Cheesy Beef Tacos: Best Weeknight Dinner
These crispy cheesy beef tacos are a quick and easy weeknight dinner that comes together in under 30 minutes. With a crunchy golden shell, gooey melted cheese, and seasoned beef, they’re a crowd-pleaser that makes any Tuesday feel special.
- Prep Time: 10 minutes
- Cook Time: 15 minutes
- Total Time: 25 minutes
- Yield: 12 tacos (4 servings) 1x
- Category: Main Course
- Cuisine: Mexican
Ingredients
- 1 pound ground beef (80/20 works best)
- 1 tablespoon olive oil
- 1 small onion, finely diced (about half a cup)
- 2 cloves garlic, minced
- 2 tablespoons taco seasoning
- 1/4 cup water
- Salt and black pepper to taste
- 12 small corn tortillas
- 2 cups shredded cheddar cheese (or Monterey Jack, or a Mexican blend)
- 3 tablespoons vegetable oil (for frying; use a neutral oil with a high smoke point like canola or avocado oil)
- Sour cream (for topping, optional)
- Salsa or pico de gallo (for topping, optional)
- Fresh cilantro, chopped (for topping, optional)
- Lime wedges (for topping, optional)
- Hot sauce (for topping, optional)
Instructions
- Heat the olive oil in a medium skillet over medium-high heat. Add the diced onion and cook for about 3 minutes until soft and translucent. Add the minced garlic and cook for another 30 seconds until fragrant. Add the ground beef, breaking it apart with a wooden spoon. Cook for 5-6 minutes until browned and no longer pink. Drain off any excess fat if needed (leave about a tablespoon for flavor).
- Sprinkle the taco seasoning over the beef, add the water, and stir everything together. Let it simmer for 2-3 minutes until the liquid thickens slightly. Taste and add salt and pepper if needed. Set the beef aside in a bowl.
- If your corn tortillas are stiff or cracking at the edges, wrap them in a damp paper towel and microwave for 20-30 seconds to make them pliable. Work with one tortilla at a time. Lay it flat on your cutting board.
- Sprinkle about 2 tablespoons of shredded cheese on one half of the tortilla. Top with about 2 tablespoons of the seasoned beef. Add another tablespoon of cheese on top of the beef. Fold the empty half of the tortilla over the filling, pressing down gently to create a half-moon shape. The cheese will act like glue to hold everything together. Do not overfill.
- Heat a large non-stick skillet over medium heat and add enough vegetable oil to coat the bottom (about 2 tablespoons). Let the oil get hot—you’ll know it’s ready when a tiny piece of tortilla sizzles immediately.
- Carefully place 3-4 assembled tacos in the skillet, seam-side down. Cook for 2-3 minutes until the bottom is golden brown and crispy. Use a thin spatula to gently flip each taco. Cook for another 2-3 minutes on the second side until golden brown and the cheese is fully melted and oozing slightly at the edges.
- Transfer the cooked tacos to a plate lined with paper towels to drain excess oil. Repeat with the remaining tacos, adding more oil to the pan as needed. You should get about 12 tacos total.
- Serve immediately while still hot and crispy. Arrange on a platter and add your favorite toppings.
Notes
Don’t skip the cheese glue—cheese on both sides of the beef bonds the tortilla shut. Use medium heat to avoid burning the tortilla before the cheese melts. Don’t crowd the pan; work in batches of 3-4. Use a thin spatula for flipping. Wait until the bottom is deeply golden before flipping. For meal prep, assemble tacos without frying and freeze; fry directly from frozen, adding 1-2 minutes to cooking time.
Nutrition
- Serving Size: 3 tacos
- Calories: 630
- Sugar: 3
- Sodium: 800
- Fat: 42
- Saturated Fat: 18
- Carbohydrates: 36
- Fiber: 6
- Protein: 36
Keywords: crispy cheesy beef tacos, easy weeknight dinner, ground beef tacos, pan-fried tacos, quick dinner, family-friendly